第一天
今年是 WWDC 的第39个年头了。今年的 WWDC.playground 活动()是 SwiftGG、T 沙龙和老司机技术一起会和社区开发者们一起聊聊这次 WWDC。WWDC.playground 活动在节日期间每天都会有直播,我会和 61、13 他们参加 6月11日晚上8点那场直播。现在那场直播的录播已经放了出来,地址是 WWDC22.playground - Day 5:回顾 WWDC22
下面我整理了一份今年 WWDC 的指南,也算提供个方便的入口吧。
- WWDC22 直播地址、微博直播、WWDC22 YouTube 地址
- Apple WWDC22 页面
- Apple WWDC22 指南
- Apple Developer app 观看 Session 的 Apple 出的 App。
- Session 网页版
- Digital Lounge 注册感兴趣的主题,到时候就可以和 Apple 工程师在 Slack 上一起看 Session,交流。
- Labs 可以获得和 Apple 专家一对一指导。6号 keynote 完后就可以开始预约。
- Beyond WWDC22 和去年一样,这里是 Apple 制作的世界各地的社区活动。
- weak self Discord WWDC22 Keynote Watch Party 全球最多听众的 iOS 中文 Podcast 之一 weak self 的活动。
- Swiftly Rush WWDC22
- iOS Feeds 的 WWDC 2022 新闻聚合
- WWWDC.io App 社区的看 Session 的 App。
- Keynote 后的 Platforms State of the Union 这个主题是对后面一周 Session 的总结,开发者可以重点关注下。
- WWDC Notes 汇聚了大家的 Session 笔记,可以快速看到各个 Session 的重点。
- Technologies 这里是 Apple 框架 API 分类地址,看完 Session 可以直接在这里找对应 API 的更新。还有个网站 Apple Platform SDK API Differences 会列出新 SDK 里有哪些框架更新了。
- Apple Design Awards 提名作品
Apple Design Awards 提名作品,我先列几个我喜欢的:
- procreate
- Wylde Flowers
- 笼中窥梦
- Gibbon: Beyond the Trees
- Vectornator: Design Software
- Wylde Flowers
- Behind the Frame
- MD Clock - Live in the present
- 专注面条
- Townscaper
第二天
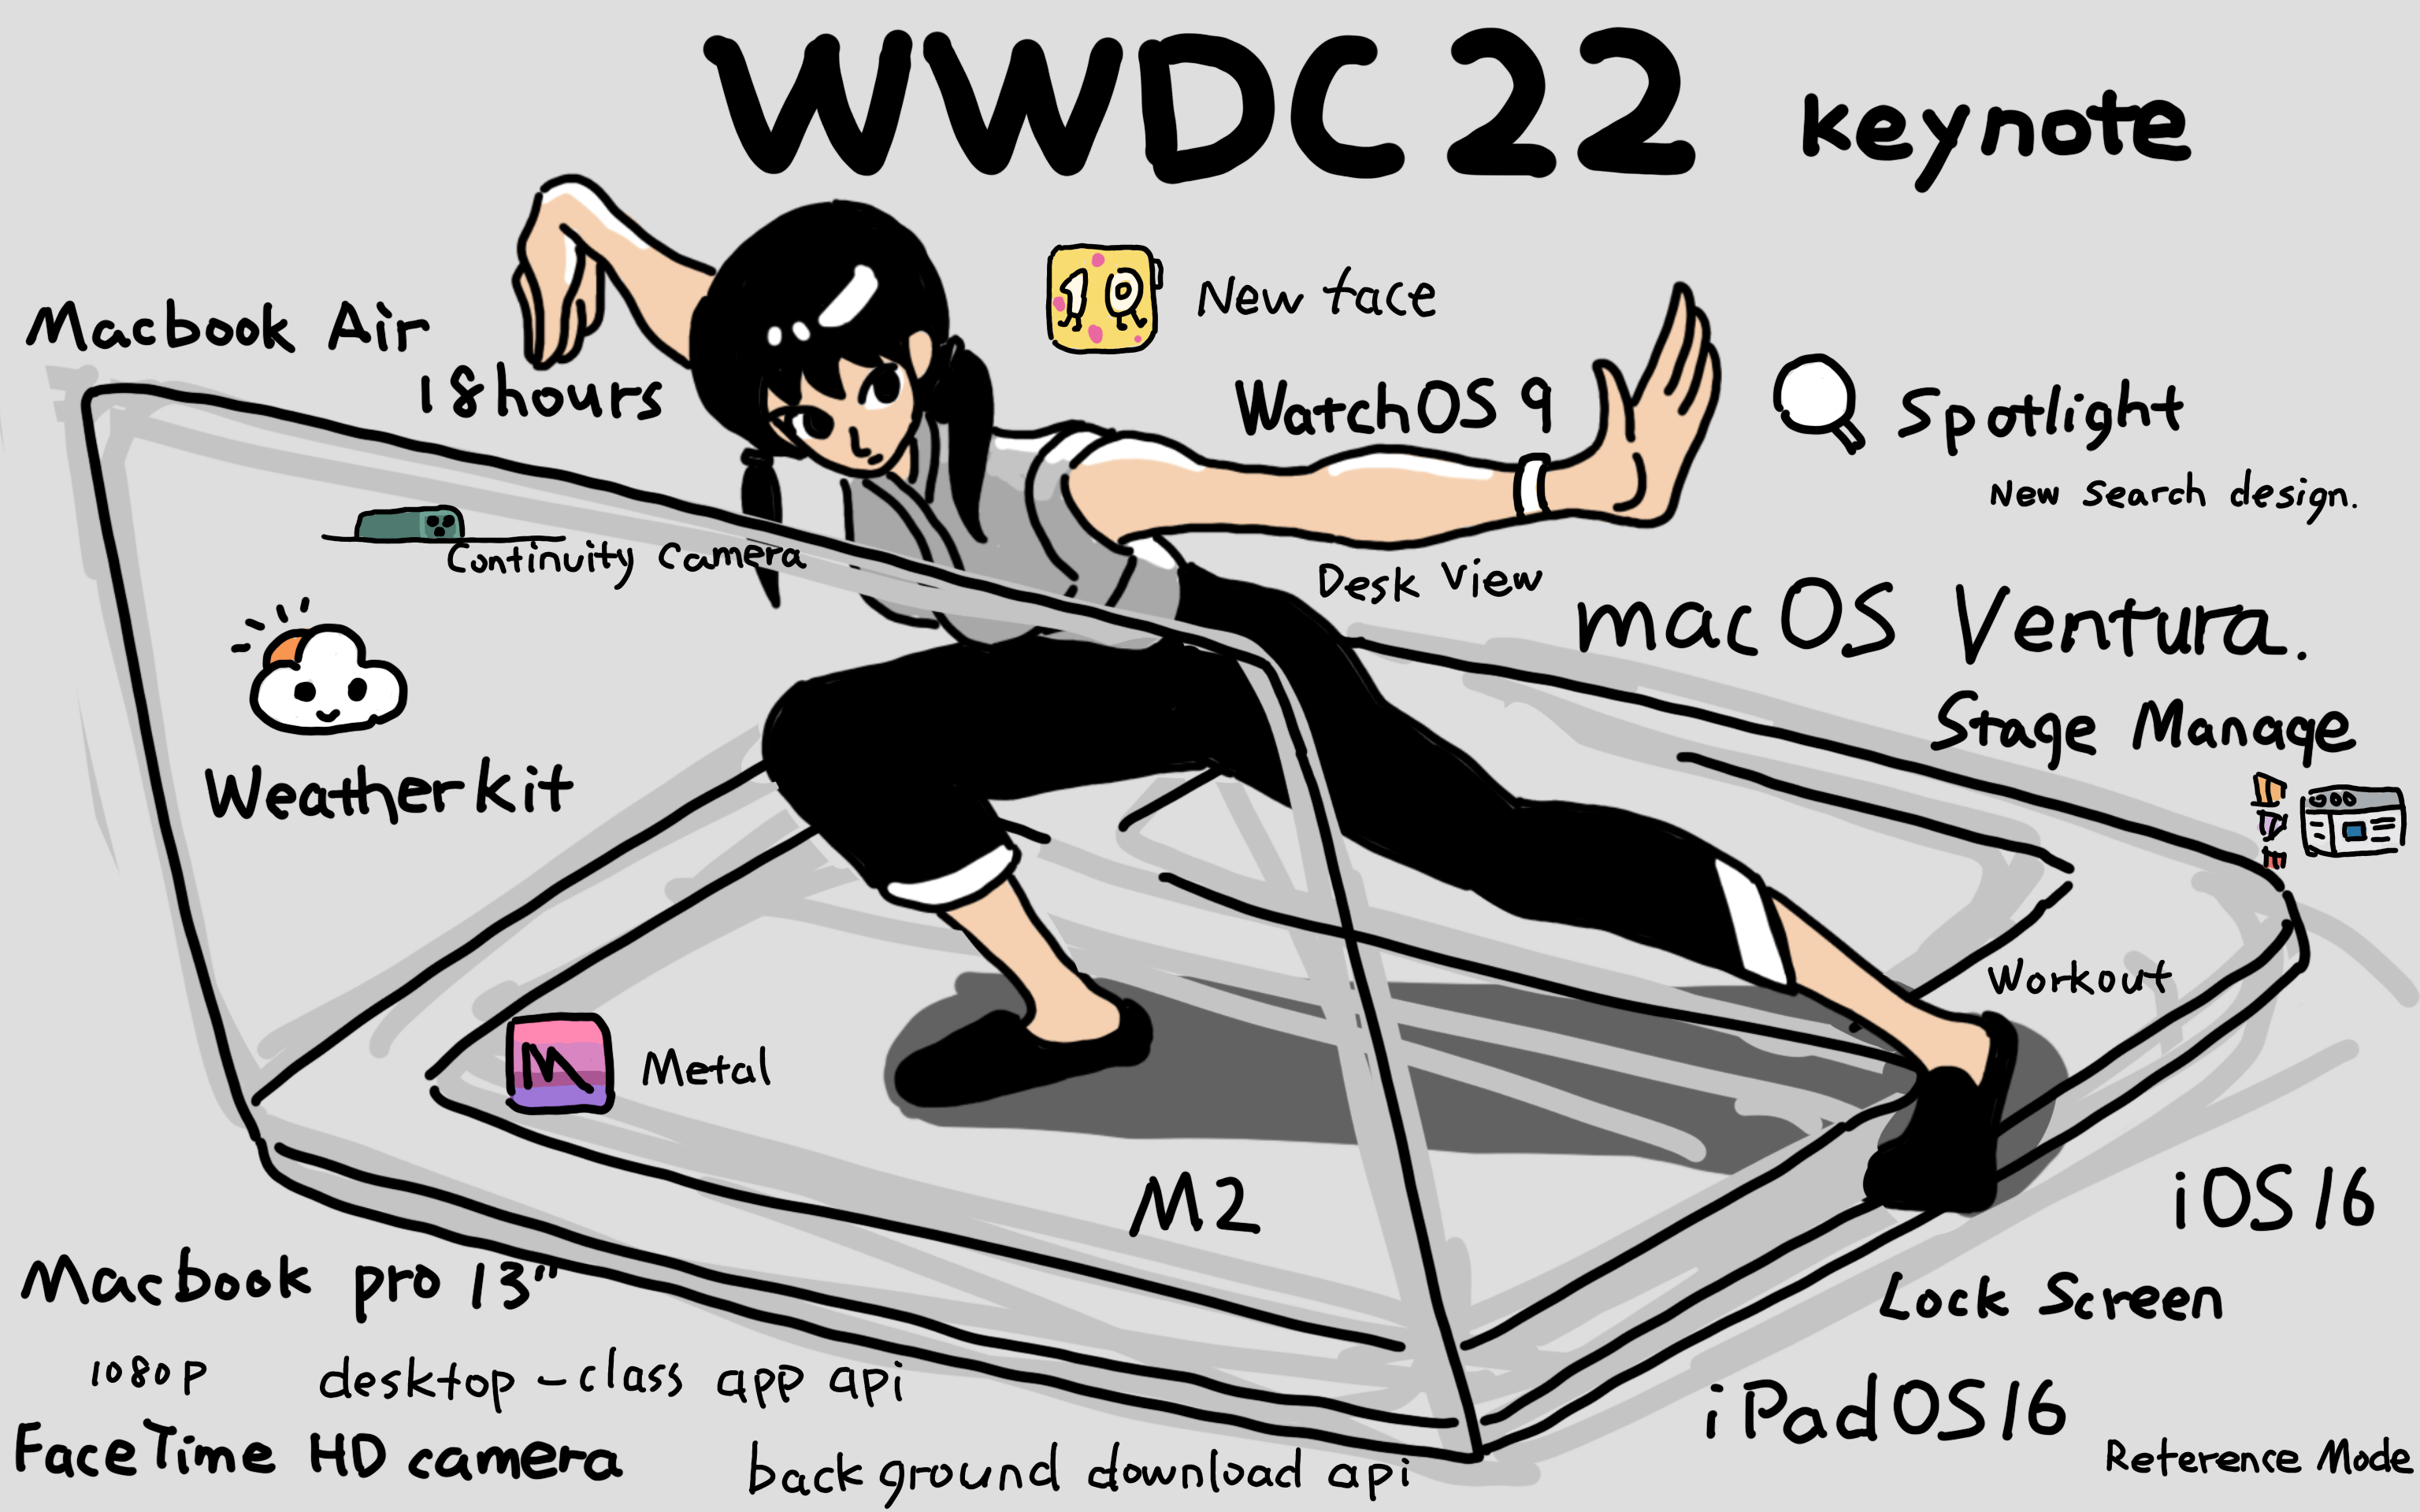
今天最让我印象深刻是 M2、Lock screen widgets、Stage manager、Swift Charts、WeatherKit、SwiftUI Navigation API、只要一个 1024x1024 App Icon、Sticky headers on Xcode scrolling、Xcode View Debugger 可以用于 SwiftUI 了,还有 iOS 16 原生的支持 Nintendo Switch Pro 手柄了。
后面我将更多内容使用点对点的分发,可以用 Planet 关注,我的 IPNS 是:k51qzi5uqu5dlorvgrleqaphsd1suegn8w40xwhxl0bgsyxw3zerivt59xbk74
Keynote 要点:
- iOS 16
- new lock screen
- live activities
- extend focus to lock screen
- forcus filter for apps
- dictation improvements
- live text in video
- visual lookup
- maps
- multistop routing
- transit(add card to wallet)
- new details
- lookaround api
- iCloud shared photo library
- persanalized spatial audio
- quick notes on iPhone
- fitness app without watch
- messages
- edit messages
- delete messages
- mark as unread
- share play
- pay
- tap to pay on iPhone
- order tracking
- carplay
- widgets
- more personalization
- multi-screen
- safety check
- quickly remove access for others
- home
- introduce matter as new standard
- redesign of app
- M2
- 15.8 trillion operations per seconds
- 10-core GPU
- macbook air and macbook pro 13”
- better and faster
- silent design
- fast charge
- new colors
- magsafe
- audio jack
- macOS Ventura
- improved spotlight
- undo send and more
- shared tab groups
- passkeys
- desk view
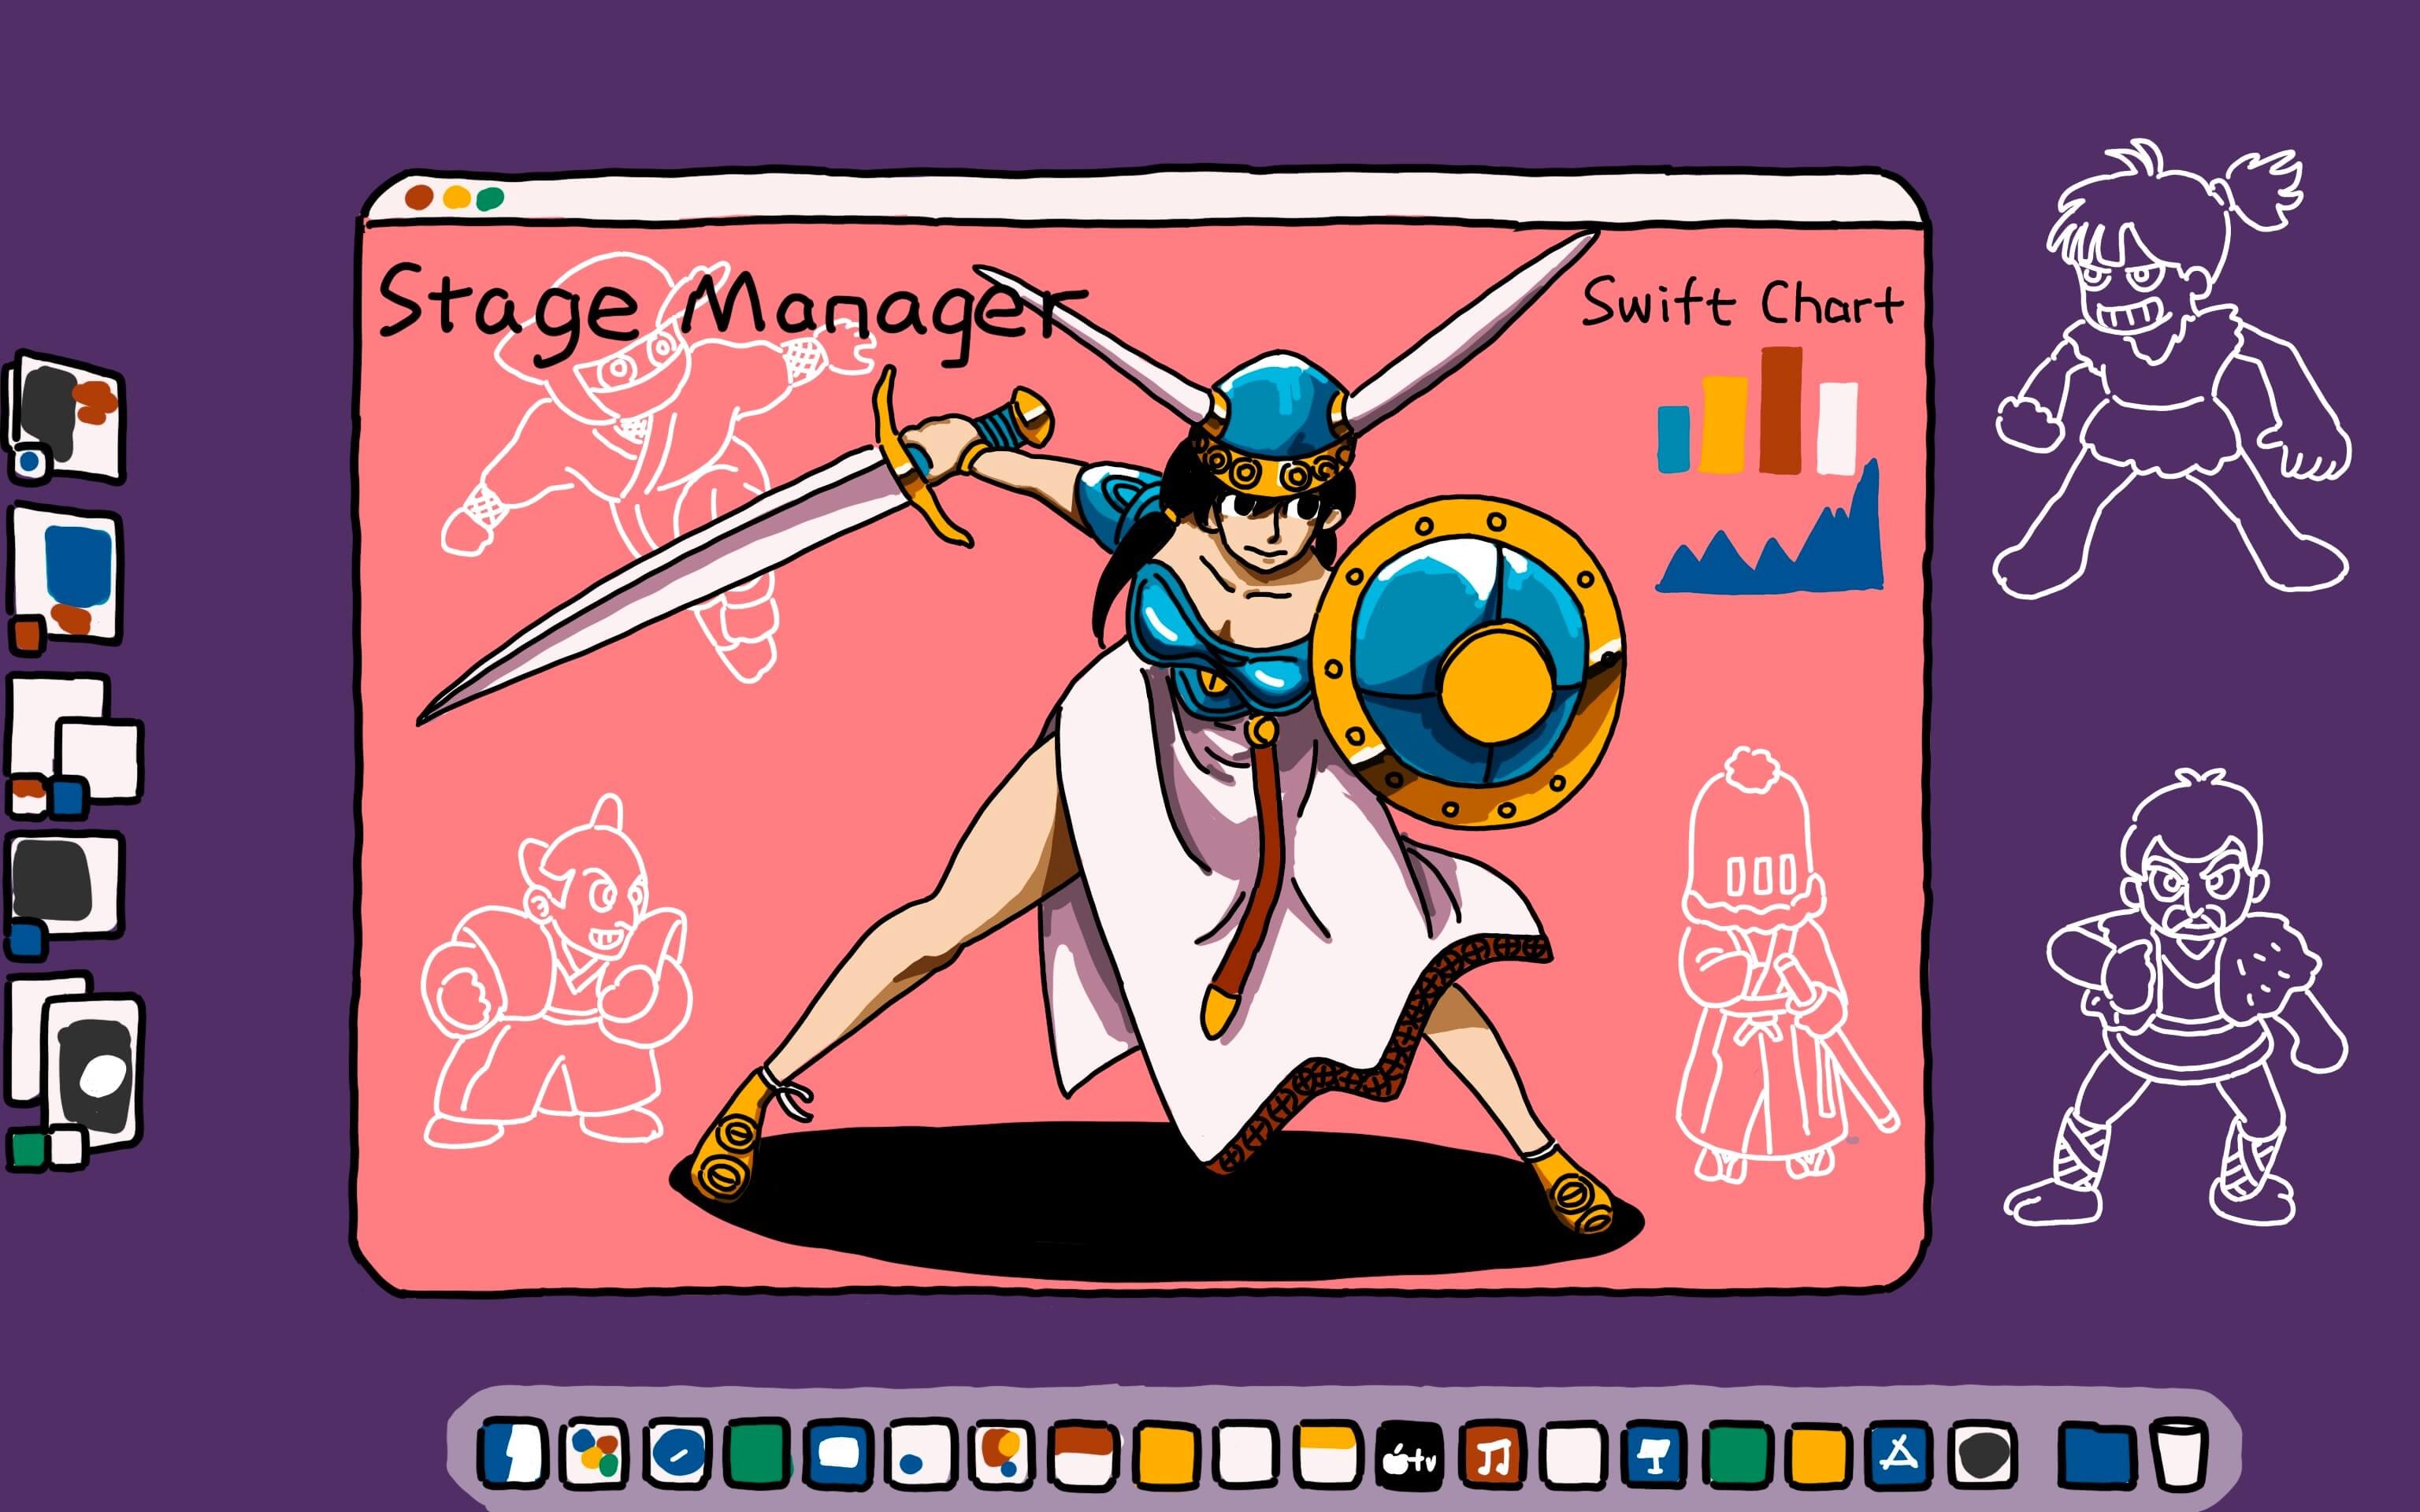
- stage manager
- continuity for facetime
- use iPhone as camera on macbook
- iPadOS 16
- weather app
- WeatherKit
- collaborations api
- freeform board
- stage manager
- WatchOS 9
- four new watch faces
- new ShareKit api
- improved metrics for running
- heart rate zones
- create custom workouts
重要的几个信息:
- Platforms State of the Union 汇总 WWDC22 技术的 Session,必看。
- iOS 16 新 API 和功能 Apple 的整理。
- New Technologies WWDC22 Apple 整理的 WWDC22 上的新技术。
- WWDC22 Sample Code
- iOS and iPadOS 16 release notes 系统接口更新说明,包括 SwiftUI 更新了啥。
- 下载 Xcode 14 beta 直接在开发者官方下载地方下。7个G,这次做了裁剪,手表和电视都做成了可选。
- Webkit 大量更新
大赞的库:
- SwiftUI 更新介绍
- Swift Charts 今年 WWDC 的惊喜。Swifty Rush 的文章介绍 Swift Charts with SwiftUI。
- Navigation API 又一个惊喜。从以前的 Navigation 迁移到新 API 的文档说明 Migrating to New Navigation Types。可以看 NavigationStack 、NavigationSplitView。相关 Session 是 The SwiftUI cookbook for navigation。Natalia Panferova 的文章的介绍 Overview of the New SwiftUI Navigation APIs
- macOS Window 支持,等到了。参看这个示例 Bringing multiple windows to your SwiftUI app。
- RegexBuilder 构建正则表达式的 DSL
- Live Text API
- Weatherkit 指南 每月在 500k 次调用内是免费。
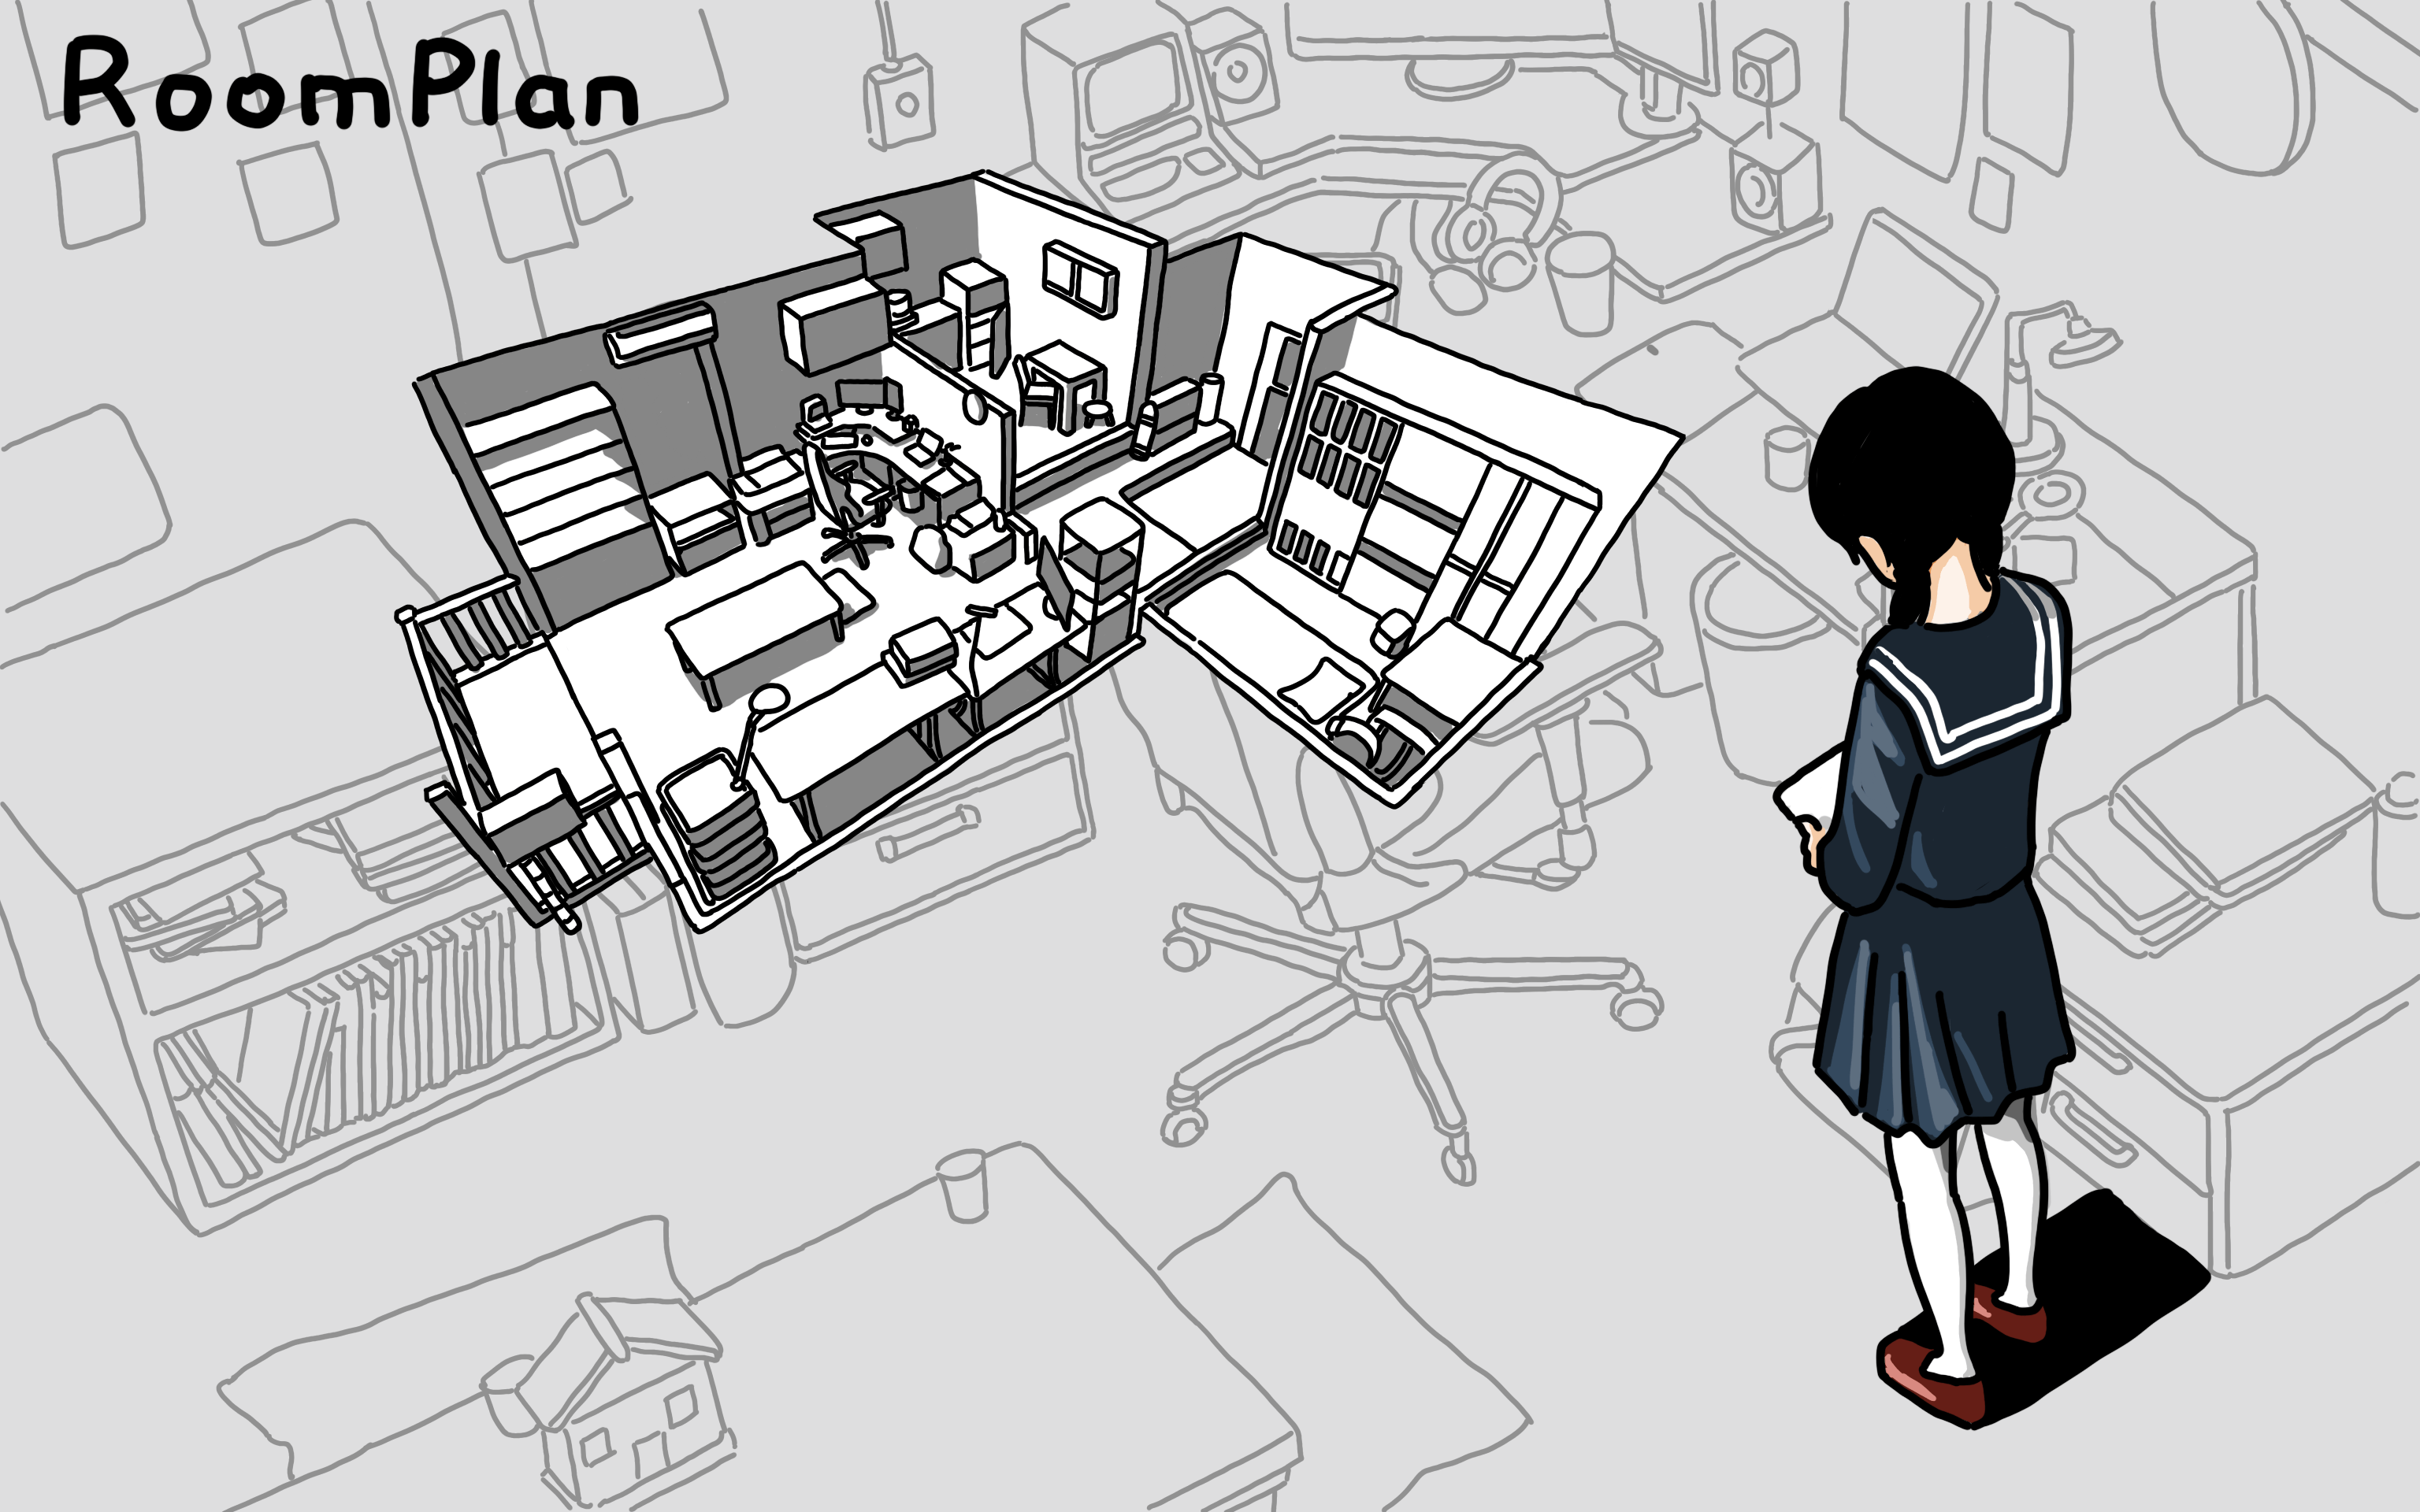
- RoomPlan 接口文档 用摄像头扫描物理环境,创建房间的 3D 模型。Introducing RoomPlan 介绍 RoomPlan。
- Spatial 轻量 3D 数学库。
- Passkey (FIDO) 原理和 Web3 钱包核心逻辑差不多。
- DriverKit 安全的 USB 和 PCI 硬件设备连接到 iPad 的库。
好用的功能和组件:
- UICalendarView 日历视图
- BADownloadManager 下载队列管理器。
- backgroundTask(_:action:)
- ImageRenderer 将 View 生成图片。
- presentationDetents 优秀。示例 Using Presentation Detents in SwiftUI
- String Index 升级
一些方便上手的例子:
- Configuring a multiplatform app 单代码,多平台 in Xcode 14。
- Food Truck: Building a SwiftUI multiplatform app 示例了 NavigationSplitView、Layout、Chart 和 WeatherKit 的运用。
一些感兴趣的 Session:
- Session 按主题分类
- What’s new in Swift
- Swift Session、Lab 和 Digital Lounges 合集 Apple 专门为 Swift 制作的 WWDC22 页面。
- Visualize and optimize Swift concurrency
- Link fast: Improve build and launch times 构建和启动加快
- Demystify parallelization in Xcode builds
- Create macOS or Linux virtual machines
第三天

WWDC.playground 很精彩,怎么感觉昨天的 WWDC.playground 像是听了一期枫言枫语呢。预感 11 号可能会变成为一期 weak self 呢。
昨天老司机还整理了份 WWDC22 Session 观看介绍的列表
Apple 出的内容看不够的话,可使用 Follow WWDC 2022 News! 来看最新的 WWDC 相关的社区文章。
下面是我今天的一些记录。
Xcode
代码补全的更新。以前多个可选参数的体验很差,这次输入参数比如 frame 里的 maxWidth,会只显示当前要补全的参数。而且速度快了很多。
以前是编完源码再生成 module,然后 link编好的文件,最后再 link。现在整个过程改成并行执行,同时 link 还快了两倍。结果是比以前快了25%,核越多效果越明显。还有可可视化整个过程。
多平台以前是多个 tagets,现在是在一个 target 里管理。
Hangs 是官方线上主线程被卡了的检查工具,在 Organizer 里查看对应问题堆栈也很方便。
当然最爱的还是 sticky headers,秒杀其它编辑器 (虽然我还是觉得 Emacs 最好,由于会暴露年龄,一般我都不说)。
还有内存也好了很多,总体来说,这次 Xcode 更新很棒。
WidgetKit
WidgetKit 将 WatchOS 上的 Circular、Rectangle 还有 Inline 带到了 iOS 和其他平台。
WeatherKit
安全方便获得用户位置信息,只用于天气。
VisionKit
Live Text API,感觉这类库都是为了以后出眼镜做铺垫的。
macOS
macOS 支持window,menuBar也支持了。
Swift
distrubuted actor 更安全,还可以在设备间(本地设备<->本地设备,本地设备<->服务器)进行通信保护。
泛型新语法 some 和 any 关键字写起来真的简化了很多。
Swift 的更新了什么,除了 Session 外,还可以参看 Paul Hudson 这篇文章 What’s new in Swift 5.7 ,还有 Donny Wals 的这篇 What’s the difference between any and some in Swift 5.7? 。
SwiftUI
SwiftUI里没有用属性包装的属性也能够和视图变化绑定了。
关于 SwiftUI 的更新,Paul Hudson 写了很多例子 What’s new in SwiftUI for iOS 16 。
Reda Lemeden 整理了 WWDC22 SwiftUI 的所有相关内容 SwiftUI @ WWDC 2022 。可见社区对 SwiftUI 热情依然是最高的。
SPM
Swift Package Plugin,本来用其他语言,比如 ruby 、python 或 shell 做的事情,现在可以通过 Swift 语言来完成了,写的 plugin 还可以方便的在 Xcode 中使用。
虚机
使用 Virtualization 框架,享受 Rosetta 2 的优势,运行 x86-64 Linux 系统。
Apple 出虚机可运行 Linux 系统这点可以看得出 Apple 对开源的拥抱,原因还有一点是 Swift 也可以用在 Linux 服务器上了,Apple 用心良苦,也是想让开发者用本打算买其它硬件的钱来买 Apple 的硬件吧,更好的榨干 Apple 硬件过于优秀的性能,如同新出 Stage Manager 通过投到大屏来榨干 M1 的 iPad 性能。 不光是这样,还有文件,也就是存储设备也只需要一份了,更方便,还有苹果特有的 Trackpad 和 Magic mouse 也能够用于 Linux 系统中。
虚机运行 Linux 和 macOS 的区别是,启动 Linux 使用的是 EFI Boot Loader 来加载 Linux 文件,VirtioGraphicDevice 进行 Linux 系统图形界面的设置和渲染。使用Rosetta 运行 Linux 系统,运行 Linux 就是比其它虚机要快。
介绍的 session Create macOS or Linux virtual machines ,代码说明 Running GUI Linux in a virtual machine on a Mac,相关主题 Virtualization
第四天
今晚五神会现身 WWDC.playground 。内容涉及 SwiftUI 和 AR,不要错过。
今日零散记录
从 Apple 推出 WeatherKit 可以看出,Apple 喜欢把关键和有想象空间盈利价值的技术掌握在自己手上,WeatherKit 提供大量数据,包括分钟、小时、每日预报,还有提前警报,这些信息的商业价值本就很大。
今天看了 WeatherKit、Swift Chart 还有 SwiftUI 的 Layout,感觉 Apple 的接口设计能力很值得学习,可能具备了这些能力才能更好地沟通。
swift-algorithms 可以使用 .indexed() 来替代 zip。
Federico Zanetello 对 Platforms State of the Union 这个 Session 做的笔记 。
应用层面,今天还有好多 Swift Chart 的介绍。
Layout
Grid、Layout、ViewThatFits、AnyLayout,特别是 Grid 还统一了 HStack 和 VStack。这些布局方式,让先前复杂的要借助 GeometryReader,且容易出错的布局有了更易的写法。Layout 协议可以为 layout 创建自定义属性,另外布局计算也会被缓存。
Link
Link fast: Improve build and launch time 详细讲了 Apple 今年怎么改进了 link,思路很棒,很值得学习。
Static linking 和 Dynamic linking ,也就是静态链接和动态链接。
静态链接就是链接各个编译好的源文件以及链接源文件和编译好的库文件,通过将函数名放到符号表,链接新文件时确定先前是否有包含的 undefined 符号,给函数的数据指令分配地址,最后生成一个有 TEXT、DATA、LINKEDIT 段的可执行文件。
今年 Apple 通过利用多核优势让静态链接快了两倍。
具体做法是,并行的拷贝文件内容。并行构建 LINKEDIT 段的各个不同部分。并行改变 UUID 计算和 codesigning 哈希。然后是提高 exports-trie 构建器的算法。使用最新的 Crypto 库利用硬件加速的优势加速 UUID 计算。提高其它静态库处理算法库,debug-notes 生成也更快了。
Apple 推荐静态库最佳实践是:
使用 -all_load 或 -force_load 可以让 .a 文件像 .o 文件那样并行处理,不过开启这个选项需要先处理重复的符号。另外一个副作用是会将一些被判断无用的代码也被链接进来,使包体变大,因此开启之前可以先使用静态分析工具分析处理,这个过程定期做就行,不用放到每次编译过程中。演讲者推荐使用 -dead_strip 选项,但是这样做并没有真实去掉费代码,以后这些代码还是会被编译分析,如果只是暂时不用,可以先注释掉。
使用 -no_exported_symbols 选项。链接器生成的 LINKEDIT 段的一部分是 exports trie,这是一个前缀树,对所有导出的符号名称、地址和标志进行编码。动态库 是会导出符号的,但运行的二进制文件其实是不用这些符号的,因此可以用 -no_exported_symbols 选项来跳过 LINKEDIT 中 trie 数据结构的创建,这样链接起来就快多了。如果程序导出符号是一百万个,这个选项就可以减少 2 到 3 秒的时间。但需要注意的是,如果要加载插件链接回主程序就需要所有的导出的 trie 数据,无法用这个选项。
另外一个是 -no_deduplicate 选项。先前 Apple 给链接器加了个 pass 用来合并函数的指令相同,函数名不相同,这个 pass 会对每个函数的指令进行递归散列,用这种方式来找重复指令,这样做比较费 CPU,由于调试时其实是不需要关注包大小,因此可以加上 -no_deduplicate 选项来跳过这个 pass。
这些选项在 Xcode 的 Other Linker Flags 里进行设置即可。
动态库也就是 dylib,其它平台就是 DSO 或 DLL。 动态链接器不是将代码从库里考到主二进制里,而是记录某种承诺,记录从动态库中使用符号名称,还有库路径。这样做好处就是好复用动态库,不用拷贝多份。虚拟内存看到多进程使用相同动态库,就会重新给这个动态库用相同的物理内存页。
动态库好处是构建快了,启动加载慢了,多个动态库不光要加载,还要在启动时链接。也就是把链接成本从本地构建换到了用户启动时。动态库还有个缺点是基于动态库的程序会有更多的 dirty 页,因为静态链接时会把全局数据放到主程序同一个 DATA 页中,动态库的话,每个都在自己的 DATA 页中。
动态库工作的原理是,可执行的二进制会有不同权限的段,至少会有 TEXT、DATA 和 LINKEDIT。分段总是操作系统页大小的倍数。TEXT 段有执行的权限,CPU 可以将页上的字节当做机器代码指令。运行时,dyld 会根据每个段权限将可执行文件 mmap() 到内存,这些段是页大小和页对齐的,虚拟内存系统可以直接将程序或动态库文件设置为 VM 范围的备份存储。在这些页的内存访问前是不会被加载到 RAM 里,就会触发一个页 fault,导致 VM 去读取文件的子范围,将内存填充到需要 RAM 页中。光映射不够,还要用某种方式“wired up”或绑到动态库上。比如要调用动态库上的某个函数,会转换成调用 site,调用 site 成为一个在相同 TEXT 段合成的 sub 的调用,相对地址在构建时就知道了,就意味着可以正确的形成 BL 指令。这样做的好处是,stub 从 DATA 加载一个指针并跳到对应的位置,不用在运行时修改 TEXT 段,dyld 只在运行时改 DATA 段。dyld 所进行的修改很简单,就是在 DATA 段里设置了一个指针而已。
当 dyld 或应用程序的指针指向自己时要 rebase,ASLR 使 dyld 以随机地址加载动态库,内部指针不能在构建时设置,dyld 在启动时 rebase 这些指针,磁盘上,如果动态库在地址零出被加载,这些指针包含它们的目标地址。LINKEDIT 需要记录的就是每个重定位的位置。然后,dyld 只需将动态库的实际加载地址添加到每个 rebase 位置。还有种修改方式是绑定,绑定就是符号引用,符号存储在 LINKEDIT 中,dyld 在动态库的 exports tire 中找实际地址,然后 dyld 将该值存储在绑定指定的位置。
今年 Apple 发布了一个新的修改方式 chained fixups。较前面两种的优势就是可以使 LINKEDIT 更小。新格式只存储每个 DATA 页中第一个 fixup 位置和一个导入的符号列表。其它信息编码到 DATA 段。iOS 13.4 就开始支持了。
下面先说下 dyld 原理介绍。
dyld 从主可执行文件开始,解析 mach-o 找依赖动态库,对动态库进行 mmap()。然后对每个动态库进行遍历并解析 mach-o 结构,根据需要加载其它动态库。加载完毕,dyld 会查找所有需要绑定符号,并在修改时使用这些地址。最后修改完,dyld 自下而上运行初始化程序。先前做的优化是只要程序和动态库,dyld 很多步骤都可以在首次启动时被缓存。
今年 Apple 做了更多的优化,这个优化叫 page-in linking,就是 dyld 在启动时做的 DATA 页面修改放到 page-in 时,也可以理解为懒修改。以前,在 mmap() 区域的某些页面中第一次使用某些地址会触发内核读入该页面。现在如果它是一个数据页,内核会应用改页需要的修改。这种机制减少了 dirty 内存和启动时间。意味着 DATA_CONST 也是干净的,可以像 TEXT 页一样被 evicted 和重新创建,以减少内存压力。需要注意的是 page-in linking 只用于启动,dlopen() 不支持。你看,Apple 优化启动的思路也是按需加载。
Apple 还提供了追踪 dyld 运行情况的 dyld_usage 工具。检查磁盘和 dyld 缓存中的二进制文件的 dyld_info 工具。
今日推荐 Session
除了 link 外,还有 Meet distributed actors in Swift 也是比看的,Mike Ash 和 Doug Gregor 一年的心血就在这了。
第五天
性能
性能的 Improve app size and runtime performance Session 值得一看。
今年苹果通过更有效的检查 Swift 协议,使 OC 消息发送调用更小,使 autorelease elision 更快更小这几个个方面来让 App 体积更小,性能更高。
Swift 协议检查。
一个协议通过 as 操作符检查传递值是否符合协议,这种检查会在编译器的构建时间被优化掉,所以往往需要在运行时借助之前计算协议检查元数据来看对象是否真的符合了协议。一些元数据是在编译时建的,但还有很多元数据只能在启动时建立,特别是使用泛型时。协议多了,会增加耗时,差不多会多一半启动时间。
今年 Apple 推出新的 Swift 运行时,可以提前计算 Swift 协议元数据,作为 App 可执行文件和它在启动时使用的任何动态库的 dyld 闭包的一部分。这个是在系统上的,因此,只要是使用了今年最新系统的 App 都会享受这个优化,可以理解为,新系统上启动老 App 也会快些。
消息发送。
Xcode 14 中新的编译器和链接器已经将 ARM64 的消息发送调用从 12 字节减少到 8 字节。因此如果你的 App 都是 OC 代码的话,使用 Xcode 14 编出来的二进制文件可以少 2%。老系统也有效。
使用 objc_stubs_small 选项可以只优化大小,获得最大的大小优化。objc_msgSend 调动有 8 个字节指令,也就是2个指令是专门用来准备 selector 的,对于任何特定的 selector,总是相同的代码,由于始终是相同的代码,那么就可以对其共享,每个 selector 只 emit 一次,而不是每次发送消息时都 emit。共享这段代码地方是一个叫 selector stub 的函数。
ARC 会在编译器插入大量的 c 的 retain/release 函数调用。这些调用遵守平台应用二进制接口(ABI)所定义的 c 语言 call convention。也就意味着我们要更多代码来完成这些调用,用来传递正确寄存器的指针。Apple 今年推出了自定义的 call convention 根据指针位置,适时使用正确变量而不用移动它,从而摆脱了调用里的多余代码。Apple 果然是坚持用户体验优先,为了更好体验不惜修改 c 的 ABI。
autorelease elision 。
App 今年对 objc 运行时进行了修改,使 autorelease elision 更小更快。deployment target 为 iOS 16 今年新系统时才可享用哦。
Apple 怎么做的呢?
ARC 在调用方插入一个 retain,在被调用的函数中插入一个 release。当我们返回我们的临时对象时,我们需要在函数中先释放它,因为它要离开 scope。在它还没有任何其它引用时还不能这么做,不然返回前他就会被销毁。Apple 现在使用一个新的 convention ,让其可以返回临时对象。做法是当返回一个自动释放值,编译器会发出一个特殊标记,这个标记会告诉运行时这是符合自动释放条件的。它的后面是 retain,我们会在后面执行。获取返回地址,也就是一个指针,将它先保存起来,然后离开运行时的自动释放调用。在运行时,可以将保留时得到的指正和先前做自动释放时保存的指针进行比较,这样标记指令不再是数据之间的比较,比较指针内存访问少。比较成功就可以省去 autorelease/retain。
autorelease elision 的优化同样也可以减少 2% 大小。感谢 Apple 为了用户和开发者 OKR 的付出。
SwiftUI
new navigation api,看完感觉我做的小册子还有幻灯应用要花些时间好好改改了。
接下来,有活干了。
WWDC.playground
明天的 WWDC.playground 嘉宾有谜底科技和 weak self,欢迎来捧场。
下面是按分类做的记录:
Swift
String Index 大升级 String Index Overhaul
参考
Regex
标准库多了个 Regex<Output> 类型,Regex 语法与 Perl、Python、Ruby、Java、NSRegularExpression 和许多其他语言兼容。可以用 let regex = try! Regex("a[bc]+") 或 let regex = /a[bc]+/ 写法来使用。SE-0350 Regex Type and Overview 引入 Regex 类型。SE-0351 Regex builder DSL 使用 result builder 来构建正则表达式的 DSL。SE-0354 Regex Literals 简化的正则表达式。SE-0357 Regex-powered string processing algorithms 提案里有基于正则表达式的新字符串处理算法。
session Meet Swift Regex 、Swift Regex: Beyond the basics
Regex 示例代码如下:
let s1 = "I am not a good painter"
print(s1.ranges(of: /good/))
do {
    let regGood = try Regex("[a-z]ood")
    print(s1.replacing(regGood, with: "bad"))
} catch {
    print(error)
}
print(s1.trimmingPrefix(/i am /.ignoresCase()))

let reg1 = /(.+?) read (\d+) books./
let reg2 = /(?<name>.+?) read (?<books>\d+) books./
let s2 = "Jack read 3 books."
do {
    if let r1 = try reg1.wholeMatch(in: s2) {
        print(r1.1)
        print(r1.2)
    }
    if let r2 = try reg2.wholeMatch(in: s2) {
        print("name:" + r2.name)
        print("books:" + r2.books)
    }
} catch {
    print(error)
}
使用 regex builders 的官方示例:
// Text to parse:
// CREDIT  03/02/2022  Payroll from employer     $200.23
// CREDIT  03/03/2022  Suspect A           $2,000,000.00
// DEBIT   03/03/2022  Ted's Pet Rock Sanctuary    $2,000,000.00
// DEBIT   03/05/2022  Doug's Dugout Dogs      $33.27

import RegexBuilder
let fieldSeparator = /\s{2,}|\t/
let transactionMatcher = Regex {
  /CREDIT|DEBIT/
  fieldSeparator
  One(.date(.numeric, locale: Locale(identifier: "en_US"), timeZone: .gmt)) // 👈🏻 we define which data locale/timezone we want to use
  fieldSeparator
  OneOrMore {
    NegativeLookahead { fieldSeparator } // 👈🏻 we stop as soon as we see one field separator
    CharacterClass.any
  }
  fieldSeparator
  One(.localizedCurrency(code: "USD").locale(Locale(identifier: "en_US")))
}
在正则表达式中捕获数据,使用 Capture:
let fieldSeparator = /\s{2,}|\t/
let transactionMatcher = Regex {
  Capture { /CREDIT|DEBIT/ } // 👈🏻
  fieldSeparator

  Capture { One(.date(.numeric, locale: Locale(identifier: "en_US"), timeZone: .gmt)) } // 👈🏻
  fieldSeparator

  Capture { // 👈🏻
    OneOrMore {
      NegativeLookahead { fieldSeparator }
      CharacterClass.any
    }
  }
  fieldSeparator
  Capture { One(.localizedCurrency(code: "USD").locale(Locale(identifier: "en_US"))) } // 👈🏻
}
// transactionMatcher: Regex<(Substring, Substring, Date, Substring, Decimal)>
泛型与协议
session Embrace Swift generics 、Design protocol interfaces in Swift
swift 5.6 和之前编写泛型接口如下:
func feed<A>(_ animal: A) where A: Animal

// 👆🏻👇🏻 Equivalents

func feed<A: Animal>(_ animal: A)
swift 5.7 可以这样写:
func feed(_ animal: some Animal)some 关键字可以用于参数和结构类型。some 会保证类型关系,而 any 会持有任意具体类型,删除类型关系。
SE-0347 Type inference from default expressions 扩展 Swift 泛型参数类型的默认值能力。如下代码示例:
func suffledArray<T: Sequence>(from options: T = 1...100) -> [T.Element] {
    Array(options.shuffled())
}

print(suffledArray())
print(suffledArray(from: ["one", "two", "three"]))
SE-0341 Opaque Parameter Declarations 使用 some 参数简化泛型参数声明。SE-0328 Structural opaque result types 扩大不透明结果返回类型可以使用的范围。SE-0360 Opaque result types with limited availability 可用性有限的不透明结果类型,比如 if #available(macOS 13.0, *) {} 就可以根据系统不同版本返回不同类型,新版本出现新类型的 View 就可以和以前的 View 类型区别开。
SE-0309 Unlock existentials for all protocols 改进了 existentials 和 泛型的交互。这样就可以更方便的检查 Any 类型的两个值是否相等
any 关键字充当的是类型擦除的助手,是通过告知编译器你使用 existential 作为类型,此语法可兼容以前系统。
SE-0346 Lightweight same-type requirements for primary associated types 引入一种新语法,用于符合泛型参数并通过相同类型要求约束关联类型。SE-0358 Primary Associated Types in the Standard Library 引入主要关联类型概念,并将其带入了标准库。这些关联类型很像泛型,允许开发者将给定关联类型的类型指定为通用约束。
SE-0353 Constrained Existential Types 基于 SE-0309 和 SE-0346 提案,在 existential 类型的上下文中重用轻量关联类型的约束。
SE-0352 Implicitly Opened Existentials 允许 Swift 在很多情况下使用协议调用泛型函数。
Swift 论坛上一个对 any 和 some 关键字语法使用场景的讨论,Do any and some help with “Protocol Oriented Testing” at all? 。
Swift Concurrency
session Eliminate data races using Swift Concurrency 、Visualize and optimize Swift concurrency 、Meet Swift Async Algorithms 。
表示持续时间有了新的放来来表达,对应提案是 SE-0329 Clock, Instant, and Duration ,continuous clock 是在系统睡眠状态还会增加时间,suspending clock 在系统睡眠状态不会增加时间。Instants 表示一个确定的时间。Duration 表示两个时间经历了多久。
新增 SE-0338 Clarify the Execution of Non-Actor-Isolated Async Functions 通过收紧可发送性检查的规则来避免潜在的数据竞争。
SE-0343 Concurrency in Top-level Code 这个提案主要是更好地支持命令行工具的开发,可以直接将 concurrency 代码写到 main.swift 文件里。
SE-0340 Unavailable From Async Attribute 提供 noasync 语法以允许我们将类型和函数标记为在异步上下文不可用。
Task 是按顺序执行的,是异步的,在 await 时可以暂停任意次数。task 是自包含的,有自己的资源,可以独立于任何其他 task 独立运行。task 通过在 body 末尾返回一个值来传递对象,值类型没问题,如果是引用类型有可能出现数据竞争。
通过 Sendable 协议 Swift 可以帮助告诉我们什么时候 task 之间共享数据是安全的。Sendable 描述的类型可以跨隔离 domain,不会有数据竞争,Swift 编译器会在构建时检查数据竞争。task 的返回类型要符合 Sendable。
引用类型只能在很少的情况下符合 Sendable。比如 final class 只有不可变的存储。对于自己内部同步的引用类型,比如锁,可以用 @unchecked Sendable 。
class ConcurrentCache<Key: Hashable & Sendable, Value: Sendable>: @unchecked Sendable {
  var lock: NSLock
  var storage: [Key: Value]

  // ...
}
Actor 提供了一种隔离状态的方法可以消除数据竞争。使用 task 来执行 actor 定义的代码。一次只能在一个 actor 上执行一个 task。actor 也是依赖 Sendable。actor 是引用类型,但隔离了他们所有属性和代码来防止并发访问。@MainActor 表示的是主线程,你要在应用中更新 UI 时来用它。
@MainActor func updateView() { … }

Task { @MainActor in
  // update UI here
}
@MainActor 也可以用于类,类的属性和方法只能在主 main actor 上访问,除非标记为 nonisolated 。
@MainActor
class ChickenValley: Sendable {
  var flock: [Chicken]
  var food: [Pineapple]

  func advanceTime() {
    for chicken in flock {
      chicken.eat(from: &food)
    }
  }
}
Distributed Actors
actor 具有分布式形式工作能力,也就是可以 RPC 通过网络读取和写入属性或者调用方法。设计为保护在跨多个进程中的低级别数据竞争。Distributed actors 可以在两个进程间建立通道,隔离它们状态,并在它们之间异步通信。每个 distributed actors 在 actor 初始化时分配一个不可以手动创建的 id,在它所属整个 distributed actor 系统中唯一标识所指 actor,这样无论 distributed actors 在哪,都可以以相同的方式与之交互。
session Meet distributed actors in Swift 。这里有个 distributed actors 的代码示例 TicTacFish: Implementing a game using distributed actors
SE-0336 Distributed Actor Isolation 和 SE-0344 Distributed Actor Runtime 是两个 Distributed Actors 的相关提案。
Apple 提供了一个参考的服务端 cluster actor 系统实现示例,cluster actor system implementation 。
Optional
SE-0345 if let shorthand for shadowing an existing optional variable 引入的新语法,用于 unwrapping optinal。
let s1: String? = "hey"
let s2: String? = "u"
if let s1 {
    print(s1)
}

guard let s1, let s2 else { return }
print(s1 + " " + s2)
类型推断
SE-0326 提高了 Swift 对闭包使用参数和类型推断的能力。如下代码:
let a = [1,2,3]
let r = a.map { i in
    if i >= 2 {
        return "\(i) 大于等于2"
    } else {
        return "\(i) 小于2"
    }
}
print(r)
Result Builders
SE-0348 buildPartialBlock for result builders 简化了实现复杂 result buiders 所需的重载。
Swift-DocC
现在支持 Swift、OC 和 C,文档标记一样。.doccarchive 包含可部署的网站内容,兼容大多数托管服务,比如 Github pages。部署到在线服务上可参考 Generating Documentation for Hosting Online 和 Publishing to GitHub Pages 文档。
和 SPM 集成参看 SwiftDocCPlugin 。
session 有 What’s new in Swift -DocC 和 Improve the discoverability of your Swift-DocC content
SE-0356 Swift Snippets 代码片段用于示例文档的提案。
调试
session Debug Swift debugging with LLDB
编译器编译 swift 文件生成 .o 文件会有 __debug_info 段,其中有可以映射到源文件和行号的地址。debug 信息可以链接到 .dSYM 包。debug 信息链接器叫 dsymutil,dsymutil 可以为每个动态库、framework 或 dylib 和可执行文件打包一个 debug 信息存档(.dSYM 包)。
image 和路径怎么重映射。使用 image list nameOfFramework 来检查 LLDB 是否找到了我们应用程序里嵌入的第三方框架的 debug dSYM。使用 image lookup 0xMemoryAddressHere 获取当前地址更多信息。要重新映射源文件 .dSYM 路径,使用 settings set target.source-map old/path new/path。每个 .dSYM 都有一个 UUID.plist,我们可以在其中设置 DBGSourcePathRemapping 这个字典。
Xcode 14 新增 swift-healthcheck 命令,这个命令可以了解 module 为何导入失败。
LLDB 怎么找到 Swift module?每个 .dSYM 包都可以包含二级制 swift module,其中可能包含桥头文件、swift 接口文件 .swiftinterface,还有 debug 信息。静态存档不是由链接器生成的,需要向链接器注册 swift module,使用 ld ... -add-ast-path /path/to/My.swiftmodule ,动态库和可执行文件的话,Xcode 会自动完成此操作。可以使用 dsymutil 来 dump 你可执行文件的符号表,并用 grep 找 swiftmodule,命令是 dsymutil -s MyApp | grep .swiftmodule 。
内存管理
相关提案包括 SE-0349 Unaligned Loads and Stores from Raw Memory 、SE-0334 Pointer API Usability Improvements 、SE-0333 Expand usability of withMemoryRebound
Set 使用新的 Temporary Buffers 功能,让 intersect 速度提升了 4 到 6 倍。
SwiftUI
介绍
Kuba Suder 做了一个 SwiftUI Index/Changelog ,从官方文档中提取版本信息,一目了然 SwiftUI 每个版本 view,modifier 还有属性做了哪些增加和改变。当然也包括这次 SwiftUI 4 的更新。还有份对今年更新整理的 cheat sheet What’s New In SwiftUI for iOS Cheat Sheet - WWDC22 。
SwiftUI 4 做了大量细节更新,比如添加了后台任务函数 backgroundTask(_:action:) 。List 改用 UICollectionView。AnyLayout 让 HStack 和 VStack 之间可以自由切换。scrollDismissesKeyboard() modifier 可以让键盘在滚动时自动 dismiss。scrollIndicators() modifier 可以隐藏 ScrollView 和 List 等视图的滚动指示。defersSystemGestures() modifier 允许我们的手势优先于系统的内置手势。颜色的 .gradient 可以获得很简单的渐变,Rectangle().fill(.red.gradient),还有 .shadow 用来创建投影 Rectangle().fill(.red.shadow(.drop(color: .black, radius: 10))),还有 .inner 内阴影。lineLimit() modifier 支持范围设置。还有一些 modifier 支持 toggle 参数,比如 .bold() 和 .italic() 等,这样利于运行时进行调整。
参考
- WWDC22 SwiftUI 和 UI 库相关专题
- 官方教程 Learnning SwiftUI
- SwiftUI 主题
- SwiftUI Session
- SwiftUI 文档
- Learning SwiftUI 一年一度官方入门教程
- Food Truck: Building a SwiftUI multiplatform app 一套代码适配 Mac、iPad 和 iPhone 的官方示例
- Reda Lemeden 整理的 WWDC22 所有 SwiftUI 相关内容
session:
社区整理的和 SwiftUI 的 digital lounges 内容:
- WWDC swiftui-lounge
- WWDC 2022: Lessons from the SwiftUI Digital Lounges javier 整理的,做了详细的分类
- #swiftui-lounge #wwdc22
Navigation 接口
控制导航启动状态、管理 size class 之间的 transition 和响应 deep link。
Navigation bar 有新的默认行为,如果没有提供标题,导航栏默认为 inline title 显示模式。使用 navigationBarTitleDisplayMode(_:) 改变显示模式。如果 navigation bar 没有标题、工具栏项或搜索内容,它就会自动隐藏。使用 .toolbar(.visible) modifier 显示一个空 navigation bar。
参考:
- Migrating to New Navigation Types 官方迁移指南
- NavigationStack
- NavigationSplitView
- The SwiftUI cookbook for navigation
NavigationStack 的示例:
struct PNavigationStack: View {
    @State private var a = [1, 3, 9] // 深层链接
    var body: some View {
        NavigationStack(path: $a) {
            List(1..<10) { i in
                NavigationLink(value: i) {
                    Label("第 \(i) 行", systemImage: "\(i).circle")
                }
            }
            .navigationDestination(for: Int.self) { i in
                Text("第 \(i) 行内容")
            }
            .navigationTitle("NavigationStack Demo")
        }
    }
}
这里的 path 设置了 stack 的深度路径。
NavigationSplitView 两栏的例子:
struct PNavigationSplitViewTwoColumn: View {
    @State private var a = ["one", "two", "three"]
    @State private var choice: String?

    var body: some View {
        NavigationSplitView {
            List(a, id: \.self, selection: $choice, rowContent: Text.init)
        } detail: {
            Text(choice ?? "选一个")
        }
    }
}
NavigationSplitView 三栏的例子:
struct PNavigationSplitViewThreeColumn: View {
    struct Group: Identifiable, Hashable {
        let id = UUID()
        var title: String
        var subs: [String]
    }

    @State private var gps = [
        Group(title: "One", subs: ["o1", "o2", "o3"]),
        Group(title: "Two", subs: ["t1", "t2", "t3"])
    ]

    @State private var choiceGroup: Group?
    @State private var choiceSub: String?

    @State private var cv = NavigationSplitViewVisibility.automatic

    var body: some View {
        NavigationSplitView(columnVisibility: $cv) {
            List(gps, selection: $choiceGroup) { g in
                Text(g.title).tag(g)
            }
            .navigationSplitViewColumnWidth(250)
        } content: {
            List(choiceGroup?.subs ?? [], id: \.self, selection: $choiceSub) { s in
                Text(s)
            }
        } detail: {
            Text(choiceSub ?? "选一个")
            Button("点击") {
                cv = .all
            }
        }
        .navigationSplitViewStyle(.prominentDetail)
    }
}
navigationSplitViewColumnWidth() 是用来自定义宽的,navigationSplitViewStyle 设置为 .prominentDetail 是让 detail 的视图尽量保持其大小。
SwiftUI 新加了个功能可以配置是否隐藏 Tabbar,这样在从主页进入下一级时就可以选择不显示底部标签栏了,示例代码如下:
ContentView().toolbar(.hidden, in: .tabBar)相比较以前 NavigationView 增强的是 destination 可以根据值的不同类型展示不同的目的页面,示例代码如下:
struct PNavigationStackDestination: View {
    var body: some View {
        NavigationStack {
            List {
                NavigationLink(value: "字符串") {
                    Text("字符串")
                }
                NavigationLink(value: Color.red) {
                    Text("红色")
                }
            }
            .navigationTitle("不同类型 Destination")
            .navigationDestination(for: Color.self) { c in
                c.clipShape(Circle())
            }
            .navigationDestination(for: String.self) { s in
                Text("\(s) 的 detail")
            }
        }
    }
}
Swift Charts
可视化数据,使用 SwiftUI 语法来创建。还可以使用 ChartRenderer 接口将图标渲染成图。
官方文档 Swift Charts
入门参看 Hello Swift Charts
Apple 文章 Creating a chart using Swift Charts
高级定制和创建更精细图表,可以看这个 session Swift Charts: Raise the bar 这个 session 也会提到如何在图表中进行交互。这里是 session 对应的代码示例 Visualizing your app’s data 。
图表设计的 session,Design an effective chart 和 Design app experiences with charts 。
下面是一个简单的代码示例:
import Charts

struct PChartModel: Hashable {
    var day: String
    var amount: Int = .random(in: 1..<100)
}

extension PChartModel {
    static var data: [PChartModel] {
        let calendar = Calendar(identifier: .gregorian)
        let days = calendar.shortWeekdaySymbols
        return days.map { day in
            PChartModel(day: day)
        }
    }
}

struct PlayCharts: View {
    var body: some View {
        Chart(PChartModel.data, id: \.self) { v in
            BarMark(x: .value("天", v.day), y: .value("数量", v.amount))

        }
        .padding()
    }
}

struct PSwiftCharts: View {
    struct CData: Identifiable {
        let id = UUID()
        let i: Int
        let v: Double
    }

    @State private var a: [CData] = [
        .init(i: 0, v: 2),
        .init(i: 1, v: 20),
        .init(i: 2, v: 3),
        .init(i: 3, v: 30),
        .init(i: 4, v: 8),
        .init(i: 5, v: 80)
    ]

    var body: some View {
        Chart(a) { i in
            LineMark(x: .value("Index", i.i), y: .value("Value", i.v))
            BarMark(x: .value("Index", i.i), yStart: .value("开始", 0), yEnd: .value("结束", i.v))
                .foregroundStyle(by: .value("Value", i.v))
        } // end Chart
    } // end body
}
BarMark 用于创建条形图,LineMark 用于创建折线图。SwiftUI Charts 框架还提供 PointMark、AxisMarks、AreaMark、RectangularMark 和 RuleMark 用于创建不同类型的图表。注释使用 .annotation modifier,修改颜色可以使用 .foregroundStyle modifier。.lineStyle modifier 可以修改线宽。
AxisMarks 的示例如下:
struct MonthlySalesChart: View {
    var body: some View {
        Chart(data, id: \.month) {
            BarMark(
                x: .value("Month", $0.month, unit: .month),
                y: .value("Sales", $0.sales)
            )
        }
        .chartXAxis {
            AxisMarks(values: .stride(by: .month)) { value in
                if value.as(Date.self)!.isFirstMonthOfQuarter {
                    AxisGridLine().foregroundStyle(.black)
                    AxisTick().foregroundStyle(.black)
                    AxisValueLabel(
                        format: .dateTime.month(.narrow)
                    )
                } else {
                    AxisGridLine()
                }
            }
        }
    }
}
可交互图表示例如下:
struct InteractiveBrushingChart: View {
    @State var range: (Date, Date)? = nil

    var body: some View {
        Chart {
            ForEach(data, id: \.day) {
                LineMark(
                    x: .value("Month", $0.day, unit: .day),
                    y: .value("Sales", $0.sales)
                )
                .interpolationMethod(.catmullRom)
                .symbol(Circle().strokeBorder(lineWidth: 2))
            }
            if let (start, end) = range {
                RectangleMark(
                    xStart: .value("Selection Start", start),
                    xEnd: .value("Selection End", end)
                )
                .foregroundStyle(.gray.opacity(0.2))
            }
        }
        .chartOverlay { proxy in
            GeometryReader { nthGeoItem in
                Rectangle().fill(.clear).contentShape(Rectangle())
                    .gesture(DragGesture()
                        .onChanged { value in
                            // Find the x-coordinates in the chart’s plot area.
                            let xStart = value.startLocation.x - nthGeoItem[proxy.plotAreaFrame].origin.x
                            let xCurrent = value.location.x - nthGeoItem[proxy.plotAreaFrame].origin.x
                            // Find the date values at the x-coordinates.
                            if let dateStart: Date = proxy.value(atX: xStart),
                               let dateCurrent: Date = proxy.value(atX: xCurrent) {
                                range = (dateStart, dateCurrent)
                            }
                        }
                        .onEnded { _ in range = nil } // Clear the state on gesture end.
                    )
            }
        }
    }
}
社区做的更多 Swift Charts 范例 Swift Charts Examples 。
Advanced layout control
session Compose custom layouts with SwiftUI
提供了新的 Grid 视图来同时满足 VStack 和 HStack。还有一个更低级别 Layout 接口,可以完全控制构建应用所需的布局。另外还有 ViewThatFits 可以自动选择填充可用空间的方式。
Grid 示例代码如下:
Grid {
    GridRow {
        Text("One")
        Text("One")
        Text("One")
    }
    GridRow {
        Text("Two")
        Text("Two")
    }
    Divider()
    GridRow {
        Text("Three")
        Text("Three")
            .gridCellColumns(2)
    }
}
gridCellColumns() modifier 可以让一个单元格跨多列。
ViewThatFits 的新视图,允许根据适合的大小放视图。ViewThatFits 会自动选择对于当前屏幕大小合适的子视图进行显示。Ryan Lintott 的示例效果 ,对应示例代码 LayoutThatFits.swift 。
新的 Layout 协议可以观看 Swift Talk 第 308 期 The Layout Protocol 。
通过符合 Layout 协议,我们可以自定义一个自定义的布局容器,直接参与 SwiftUI 的布局过程。新的 ProposedViewSize 结构,它是容器视图提供的大小。 Layout.Subviews 是布局视图的子视图代理集合,我们可以在其中为每个子视图请求各种布局属性。
public protocol Layout: Animatable {
  static var layoutProperties: LayoutProperties { get }
  associatedtype Cache = Void
  typealias Subviews = LayoutSubviews

  func updateCache(_ cache: inout Self.Cache, subviews: Self.Subviews)

  func spacing(subviews: Self.Subviews, cache: inout Self.Cache) -> ViewSpacing

  /// We return our view size here, use the passed parameters for computing the
  /// layout.
  func sizeThatFits(
    proposal: ProposedViewSize,
    subviews: Self.Subviews,
    cache: inout Self.Cache // 👈🏻 use this for calculated data shared among Layout methods
  ) -> CGSize

  /// Use this to tell your subviews where to appear.
  func placeSubviews(
    in bounds: CGRect, // 👈🏻 region where we need to place our subviews into, origin might not be .zero
    proposal: ProposedViewSize,
    subviews: Self.Subviews,
    cache: inout Self.Cache
  )

  // ... there are more a couple more optional methods
}
下面例子是一个自定义的水平 stack 视图,为其所有子视图提供其最大子视图的宽度:
struct MyEqualWidthHStack: Layout {
  /// Returns a size that the layout container needs to arrange its subviews.
  /// - Tag: sizeThatFitsHorizontal
  func sizeThatFits(
    proposal: ProposedViewSize,
    subviews: Subviews,
    cache: inout Void
  ) -> CGSize {
    guard !subviews.isEmpty else { return .zero }

    let maxSize = maxSize(subviews: subviews)
    let spacing = spacing(subviews: subviews)
    let totalSpacing = spacing.reduce(0) { $0 + $1 }

    return CGSize(
      width: maxSize.width * CGFloat(subviews.count) + totalSpacing,
      height: maxSize.height)
  }

  /// Places the stack's subviews.
  /// - Tag: placeSubviewsHorizontal
  func placeSubviews(
    in bounds: CGRect,
    proposal: ProposedViewSize,
    subviews: Subviews,
    cache: inout Void
  ) {
    guard !subviews.isEmpty else { return }

    let maxSize = maxSize(subviews: subviews)
    let spacing = spacing(subviews: subviews)

    let placementProposal = ProposedViewSize(width: maxSize.width, height: maxSize.height)
    var nextX = bounds.minX + maxSize.width / 2

    for index in subviews.indices {
      subviews[index].place(
        at: CGPoint(x: nextX, y: bounds.midY),
        anchor: .center,
        proposal: placementProposal)
      nextX += maxSize.width + spacing[index]
    }
  }

  /// Finds the largest ideal size of the subviews.
  private func maxSize(subviews: Subviews) -> CGSize {
    let subviewSizes = subviews.map { $0.sizeThatFits(.unspecified) }
    let maxSize: CGSize = subviewSizes.reduce(.zero) { currentMax, subviewSize in
      CGSize(
        width: max(currentMax.width, subviewSize.width),
        height: max(currentMax.height, subviewSize.height))
    }

    return maxSize
  }

  /// Gets an array of preferred spacing sizes between subviews in the
  /// horizontal dimension.
  private func spacing(subviews: Subviews) -> [CGFloat] {
    subviews.indices.map { index in
      guard index < subviews.count - 1 else { return 0 }
      return subviews[index].spacing.distance(
        to: subviews[index + 1].spacing,
        along: .horizontal)
    }
  }
}
自定义 layout 只能访问子视图代理 Layout.Subviews ,而不是视图或数据模型。我们可以通过 LayoutValueKey 在每个子视图上存储自定义值,通过 layoutValue(key:value:) modifier 设置。
private struct Rank: LayoutValueKey {
  static let defaultValue: Int = 1
}

extension View {
  func rank(_ value: Int) -> some View { // 👈🏻 convenience method
    layoutValue(key: Rank.self, value: value) // 👈🏻 the new modifier
  }
}
然后,我们就可以通过 Layout 方法中的 Layout.Subviews 代理读取自定义 LayoutValueKey 值:
func placeSubviews(
  in bounds: CGRect,
  proposal: ProposedViewSize,
  subviews: Subviews,
  cache: inout Void
) {
  let ranks = subviews.map { subview in
    subview[Rank.self] // 👈🏻
  }

  // ...
}
要在布局之间变化使用动画,需要用 AnyLayout,代码示例如下:
struct PAnyLayout: View {
    @State private var isVertical = false
    var body: some View {
        let layout = isVertical ? AnyLayout(VStack()) : AnyLayout(HStack())
        layout {
            Image(systemName: "star").foregroundColor(.yellow)
            Text("Starming.com")
            Text("戴铭")
        }
        Button("Click") {
            withAnimation {
                isVertical.toggle()
            }
        } // end button
    } // end body
}
同时 Text 和图片也支持了样式布局变化,代码示例如下:
struct PTextTransitionsView: View {
    @State private var expandMessage = true
    private let mintWithShadow: AnyShapeStyle = AnyShapeStyle(Color.mint.shadow(.drop(radius: 2)))
    private let primaryWithoutShadow: AnyShapeStyle = AnyShapeStyle(Color.primary.shadow(.drop(radius: 0)))

    var body: some View {
        Text("Dai Ming Swift Pamphlet")
            .font(expandMessage ? .largeTitle.weight(.heavy) : .body)
            .foregroundStyle(expandMessage ? mintWithShadow : primaryWithoutShadow)
            .onTapGesture { withAnimation { expandMessage.toggle() }}
            .frame(maxWidth: expandMessage ? 150 : 250)
            .drawingGroup()
            .padding(20)
            .background(.cyan.opacity(0.3), in: RoundedRectangle(cornerRadius: 6))
    }
}
分享接口
Transferable 协议使数据可以用于剪切板、拖放和 Share Sheet。
可以在自己应用程序之间或你的应用和其他应用之间发送或接受可传输项目。
支持 SwiftUI 来使用。
官方文档 Core Transferable
session Meet Transferable
新增一个专门用来接受 Transferable 的按钮视图 PasteButton,使用示例如下:
struct PPasteButton: View {
    @State private var s = "戴铭"
    var body: some View {
        TextField("输入", text: $s)
            .textFieldStyle(.roundedBorder)
        PasteButton(payloadType: String.self) { str in
            guard let first = str.first else { return }
            s = first
        }
    }
}
ShareLink
ShareLink 视图可以让你轻松共享数据。示例代码如下:
struct PShareLink: View {
    let url = URL(string: "https://ming1016.github.io/")!
    var body: some View {
        ShareLink(item: url, message: Text("戴铭的博客"))
        ShareLink("戴铭的博客", item: url)
        ShareLink(item: url) {
            Label("戴铭的博客", systemImage: "swift")
        }
    }
}
锁屏的 Widget
和 WatchOS 一样,可以瞟一眼就获取信息。
官方指南 Creating Lock Screen Widgets and Watch Complications
Bottom Sheet
SwiftUI 新推出的 presentationDetents() modifier 可以创建一个可以定制的 bottom sheet。示例代码如下:
struct PSheet: View {
    @State private var isShow = false
    var body: some View {
        Button("显示 Sheet") {
            isShow.toggle()
        }
        .sheet(isPresented: $isShow) {
            Text("这里是 Sheet 的内容")
                .presentationDetents([.medium, .large])
        }
    }
}
detent 默认值是 .large。也可以提供一个百分比,比如 .presentationDetents([.fraction(0.7)]),或者直接指定高度 .presentationDetents([.height(100)])。
presentationDragIndicator modifier 可以用来显示隐藏拖动标识。
List
list 支持 Section footer。
list 分隔符可以自定义,使用 HorizontalEdge.leading 和 HorizontalEdge.trailing 。
list 不使用 UITableView 了。
今年 list 还新增了一个 EditOperation 可以自动生成移动和删除,新增了 edits 参数,传入 [.delete, .move] 数组即可。这也是一个演示如何更好扩展和配置功能的方式。
ScrollView
新增 modifier
ScrollView {
    ForEach(0..<300) { i in
        Text("\(i)")
            .id(i)
    }
}
.scrollDisabled(false)
.scrollDismissesKeyboard(.interactively)
.scrollIndicators(.visible)
TextField
支持多行,使用 Axis.vertical 以允许多行。TextField 超过行限制可以变成滚动视图。
今年 TextField 可以嵌到 .alert 里了。
Search
.searchable 支持 token 和 scope,示例如下:
struct PSearchTokensAndScopes: View {
    enum AttendanceScope {
        case inPerson, online
    }
    @State private var queryText: String
    @State private var queryTokens: [InvitationToken]
    @State private var scope: AttendanceScope

    var body: some View {
        invitationCountView()
            .searchable(text: $queryText, tokens: $queryTokens, scope: $scope) { token in
                Label(token.diplayName, systemImage: token.systemImage)
            } scopes: {
                Text("In Person").tag(AttendanceScope.inPerson)
                Text("Online").tag(AttendanceScope.online)
            }
    }
}
Gauge
SwiftUI 引入一个新显示进度的视图 Gauge。
简单示例如下:
struct PGauge: View {
    @State private var progress = 0.45
    var body: some View {
        Gauge(value: progress) {
            Text("进度")
        } currentValueLabel: {
            Text(progress.formatted(.percent))
        } minimumValueLabel: {
            Text(0.formatted(.percent))
        } maximumValueLabel: {
            Text(100.formatted(.percent))
        }

        Gauge(value: progress) {

        } currentValueLabel: {
            Text(progress.formatted(.percent))
                .font(.footnote)
        }
        .gaugeStyle(.accessoryCircularCapacity)
        .tint(.cyan)
    }
}
Group Form
Form 今年也得到了增强,示例如下:
Form {
    Section {
        LabeledContent("Location") {
            AddressView(location)
        }
        DatePicker("Date", selection: $date)
        TextField("Description", text: $eventDescription, axis: .vertical)
            .lineLimit(3, reservesSpace: true)
    }

    Section("Vibe") {
        Picker("Accent color", selection: $accent) {
            ForEach(Theme.allCases) { accent in
                Text(accent.rawValue.capitalized).tag(accent)
            }
        }
        Picker("Color scheme", selection: $scheme) {
            Text("Light").tag(ColorScheme.light)
            Text("Dark").tag(ColorScheme.dark)
        }
#if os(macOS)
        .pickerStyle(.inline)
#endif
        Toggle(isOn: $extraGuests) {
            Text("Allow extra guests")
            Text("The more the merrier!")
        }
        if extraGuests {
            Stepper("Guests limit", value: $spacesCount, format: .number)
        }
    }

    Section("Decorations") {
        Section {
            List(selection: $selectedDecorations) {
                DisclosureGroup {
                    HStack {
                        Toggle("Balloons 🎈", isOn: $includeBalloons)
                        Spacer()
                        decorationThemes[.balloon].map { $0.swatch }
                    }
                    .tag(Decoration.balloon)

                    HStack {
                        Toggle("Confetti 🎊", isOn: $includeConfetti)
                        Spacer()
                        decorationThemes[.confetti].map { $0.swatch }
                    }
                    .tag(Decoration.confetti)

                    HStack {
                        Toggle("Inflatables 🪅", isOn: $includeInflatables)
                        Spacer()
                        decorationThemes[.inflatables].map { $0.swatch }
                    }
                    .tag(Decoration.inflatables)

                    HStack {
                        Toggle("Party Horns 🥳", isOn: $includeBlowers)
                        Spacer()
                        decorationThemes[.noisemakers].map { $0.swatch }
                    }
                    .tag(Decoration.noisemakers)
                } label: {
                    Toggle("All Decorations", isOn: [
                        $includeBalloons, $includeConfetti,
                        $includeInflatables, $includeBlowers
                    ])
                    .tag(Decoration.all)
                }
#if os(macOS)
                .toggleStyle(.checkbox)
#endif
            }

            Picker("Decoration theme", selection: themes) {
                Text("Blue").tag(Theme.blue)
                Text("Black").tag(Theme.black)
                Text("Gold").tag(Theme.gold)
                Text("White").tag(Theme.white)
            }
#if os(macOS)
            .pickerStyle(.radioGroup)
#endif
        }
    }

}
.formStyle(.grouped)
Button
.buttonStyle 可组合,示例如下:
struct PButtonStyleComposition: View {
    @State private var isT = false
    var body: some View {
        Section("标签") {
            VStack(alignment: .leading) {
                HStack {
                    Toggle("Swift", isOn: $isT)
                    Toggle("SwiftUI", isOn: $isT)
                }
                HStack {
                    Toggle("Swift Chart", isOn: $isT)
                    Toggle("Navigation API", isOn: $isT)
                }
            }
            .toggleStyle(.button)
            .buttonStyle(.bordered)
        }
    }
}
Tap Location
可以获取点击的位置,示例代码如下:
Rectangle()
    .fill(.green)
    .frame(width: 50, height: 50)
    .onTapGesture(coordinateSpace: .global) { location in
        print("Tap in \(location)")
    }
其中 coordinateSpace 指定为 .global 表示位置是相对屏幕左上角,默认是相对当前视图的左上角的位置。
选择多个日期
MultiDatePicker 视图会显示一个日历,用户可以选择多个日期,可以设置选择范围。示例如下:
struct PMultiDatePicker: View {
    @Environment(\.calendar) var cal
    @State var dates: Set<DateComponents> = []
    var body: some View {
        MultiDatePicker("选择个日子", selection: $dates, in: Date.now...)
        Text(s)
    }
    var s: String {
        dates.compactMap { c in
            cal.date(from:c)?.formatted(date: .long, time: .omitted)
        }
        .formatted()
    }
}
PhotosPick
支持图片选择,示例代码如下:
import PhotosUI
import CoreTransferable

struct ContentView: View {
    @ObservedObject var viewModel: FilterModel = .shared

    var body: some View {
        NavigationStack {
            Gallery()
                .navigationTitle("Birthday Filter")
                .toolbar {
                    PhotosPicker(
                        selection: $viewModel.imageSelection,
                        matching: .images
                    ) {
                        Label("Pick a photo", systemImage: "plus.app")
                    }
                    Button {
                        viewModel.applyFilter()
                    } label: {
                        Label("Apply Filter", systemImage: "camera.filters")
                    }
                }
        }
    }
}
Table
今年 iOS 和 iPadOS 也可以使用去年只能在 macOS 上使用的 Table了,据 digital lounges 里说,iOS table 的性能和 list 差不多,table 默认为 plian list。我想 iOS 上加上 table 只是为了兼容 macOS 代码吧。
table 使用示例如下:
Table(attendeeStore.attendees) {
    TableColumn("Name") { attendee in
        AttendeeRow(attendee)
    }
    TableColumn("City", value: \.city)
    TableColumn("Status") { attendee in
        StatusRow(attendee)
    }
}
.contextMenu(forSelectionType: Attendee.ID.self) { selection in
    if selection.isEmpty {
        Button("New Invitation") { addInvitation() }
    } else if selection.count == 1 {
        Button("Mark as VIP") { markVIPs(selection) }
    } else {
        Button("Mark as VIPs") { markVIPs(selection) }
    }
}
Toolbar
对 toolbar 的自定义,示例如下:
.toolbar(id: "toolbar") {
    ToolbarItem(id: "new", placement: .secondaryAction) {
        Button(action: {}) {
            Label("New Invitation", systemImage: "envelope")
        }
    }
}
.toolbarRole(.editor)
SF Symbol
SF Symbol 支持变量值,可以通过设置 variableValue 来填充不同部分,比如 wifi 图标,不同值会亮不同部分,Image(systemName: "wifi", variableValue: 0.5) 。
Gradient 和 Shadow
下面是个简单示例:
struct PGradientAndShadow: View {
    var body: some View {
        Image(systemName: "bird")
            .frame(width: 150, height: 150)
            .background(in: Rectangle())
            .backgroundStyle(.cyan.gradient)
            .foregroundStyle(.white.shadow(.drop(radius: 1, y: 3.0)))
            .font(.system(size: 60))
    }
}
Paul Hudson 使用 Core Motion 做了一个阴影随设备倾斜而变化的效果,非常棒,How to use inner shadows to simulate depth with SwiftUI and Core Motion 。
嵌入 UIKit
示例如下:
cell.contentConfiguration = UIHostingConfiguration {
    VStack {
        Image(systemName: "wand.and.stars")
            .font(.title)
        Text("Like magic!")
            .font(.title2).bold()
    }
    .foregroundStyle(Color.purple)
}
macOS
支持了 window,可以控制位置和大小。官方代码示例 Bringing multiple windows to your SwiftUI app
openWindow 代码示例如下:
struct PartyPlanner: App {
    var body: some Scene {
        WindowGroup("Party Planner") {
            PartyPlannerHome()
        }

        Window("Party Budget", id: "budget") {
            Text("Budget View")
        }
        .keyboardShortcut("0")
        .defaultPosition(.topLeading)
        .defaultSize(width: 220, height: 250)
    }
}

struct DetailView: View {
    @Environment(\.openWindow) var openWindow

    var body: some View {
        Text("Detail View")
            .toolbar {
                Button {
                    openWindow(id: "budget")
                } label: {
                    Image(systemName: "dollarsign")
                }
            }
    }
}
session Bring multiple windows to your SwiftUI app 两个新 Scene 类型。WindowGroup 允许多 window。MenuBarExtra。可编程方式打开新 window 和 document。
MenuBarExtra 代码示例如下:
struct PartyPlanner: App {
    var body: some Scene {
        Window("Party Budget", id: "budget") {
            Text("Budget View")
        }

        MenuBarExtra("Bulletin Board", systemImage: "quote.bubble") {
            BulletinBoard()
        }
        .menuBarExtraStyle(.window)
    }
}
讲和 AppKit 混编的 session Use SwiftUI with AppKit
The craft of SwiftUI API design: Progressive disclosure 使用 windows 还有 MenuBarExtra,使用 modifier 来自定义应用程序 window 的 presentation 和行为。
使用 .dropDestination 来支持拖动。示例如下:
.dropDestination(payloadType: Image.self) { receivedImages, location in
        guard let image = receivedImages.first else {
            return false
        }
        viewModel.imageState = .success(image)
        return true
    }
今年有新的 FormStyle ,示例如下:
Form {
    Picker("Notify Me About:", selection: $notifyMeAbout) {
        Text("Direct Messages").tag(NotifyMeAboutType.directMessages)
        Text("Mentions").tag(NotifyMeAboutType.mentions)
        Text("Anything").tag(NotifyMeAboutType.anything)
    }
    Toggle("Play notification sounds", isOn: $playNotificationSounds)
    Toggle("Send read receipts", isOn: $sendReadReceipts)

    Picker("Profile Image Size:", selection: $profileImageSize) {
        Text("Large").tag(ProfileImageSize.large)
        Text("Medium").tag(ProfileImageSize.medium)
        Text("Small").tag(ProfileImageSize.small)
    }
    .pickerStyle(.inline)
}
.formStyle(.columns)
Apple 自身在 macOS 系统中使用了多少 SwiftUI 呢?邮件、iWork 和 Keychain Access 的部分视图使用了,笔记、照片 和 Xcode 部分功能及新增功能的完整界面都是用的 SwiftUI,另外控制中心、字体册和系统设置的大部分都是用 SwiftUI 开发了。
ImageRenderer
可以将 SwiftUI 的 View 生成图片。
官方参考文档 ImageRenderer
后台任务
session Efficiency awaits: Background tasks in SwiftUI 了解如何使用 SwiftUI 后台任务 API 简洁地处理任务。展示如何使用 Swift Concurrency 来处理网络响应、后台刷新等——同时保持性能和功率。
Xcode 14
Xcode 14 里有新的 Swift 5.7,其中对泛型和协议有很大的改进。
参考
- WWDC22 开发工具专题
- 配置多平台应用程序
- 使用 DocC 给应用程序、框架、包创建文档
- 在设备上启用开发者模式
- Xcode 14 Beta Release Notes
- What’s new in Xcode
- Demystify parallelization in Xcode builds
- Use Xcode to develop a multiplatform app
- Use Xcode for server-side development
- Simplify C++ templates with concepts
通用
编出来的二进制小 30%。
改进了并行性,构建提速 25%。
改进了在 iOS 设备上调试 Swift 程序的性能。
提供单一图标大小,Xcode 完成剩下的。
更智能的代码完成,滚动时置顶类、结构体和函数名。错误消息在重新处理时会变暗。
Xcode 搜索和替换栏中可以使用正则表达式。相信以后社区会出现很多好用的正则表达式分享。
Xcode Organizer 中新增 Hang 报告,用来提供主线程上发生挂起的调用堆栈信息,以及提供设备和 iOS 版本信息等统计信息。
Xcode 14 现在支持为 iPadOS 开发 DriverKit 驱动程序。
创建新 C++ 项目,Clang 默认使用 C++20。已经实现了几篇 C++20 和 C++2b 论文。
iOS、tvOS 和 watchOS 的构建默认不再包含 bitcode。
legacy 构建系统被删除,LLVM 14 也不再支持 legacy。
Xcode 中的 Swift-DocC 现支持 OC 和 C 的 API 构建文档。生成的 Swift-DocC 文档网站包括一个新的导航侧边栏,用于浏览和过滤文档。可将 Swift-DocC 部署到 GitHub Pages。
性能问题修复
代码完成不再自动导入模块。
提高了复杂表达式 SwiftUI 中代码完成的速度和准确性。
修复了包含大量错误或警告的文件时导致性能下降的问题。
修复了 minimap 在长文件时性能问题。
源码编辑器
滚动编辑器时,Xcode 会将代码结构的元素固定到编辑器顶部。
支持了 Regex 表达式语法高亮。Editor > Refactoring > Convert to Regex Builder 可以将正则文本转成等效 Regex builder。
可以输入匹配参数来选择代码完成中默认参数的任意组合。
Swift 中代码完成提供基于变量名的 map、filter 和 contains 的 snippet。
提高 Swift 代码完成的准确性。
SwiftUI 的代码完成,现在有了 List 和 ForEach 的 snippet。
Xcode 14 还要很多贴心代码完成改进,比如写 struct 的 init 可以自动完成。Codable 的 encode 也可以自动完成。
Xcode Preview
Preview 增强,默认是交互式的。
创建新项目会自动 resume。大量编辑时也不会暂停。会动态调整更新频率。
Swift Packages
引入新参数 moduleAliases 来为冲突的模块定义唯一名称,并以新名称构建而不用改代码。注意的是起别名的模块要是纯 Swift 模块。
允许使用 Swift Package command plugins。Xcode 为 Swift Package plugins 提供了 XcodeProjectPlugin 接口,这个接口扩展了 Swift Package Manager 的 PackagePlugin 接口。用这个接口可以获得 Xcode 项目结构的简化描述。
session 有 Meet Swift Package plugins 和 Create Swift Package plugins 。
Instrument
Hang Tracing 工具,可以显示应用程序的主线程什么时候无法长时间处理传入事件,从而导致 UI 卡住。
Runloop 工具,显示 runloop 的使用和单独的迭代,视觉上区分了进程中所有 runloop 的 runloop sleep 和 busy interval。
Instrument 新模板更方便调试 distributed actors 和其它 Swift concurrency 特性。
memory graph 调试器可以显示 memory graph 的所有传入和传出引用。
Instrument 现有一个新的 Swift Concurrency 模板,用于跟踪 swift concurrency 的使用。这个模板包括 Swift Tasks 工具,可显示随时间变化的 task 的状态,总结 task 状态,提供详细的 task 描述,task 关系和 task 创建 callstacks 的调用树结构。还有 Swift Actors 工具,可以跟踪 actor 之间的 task 行为,显示每个 actor 的 task 队列,并帮助诊断 actor-isolated 代码等问题。
Instrument 里的代码查看更好显示包含了性能数据。Interleave 模式,可以同时查看源码和关联的反汇编。源码查看现在会在源码和反汇编判断显示 CPU 计数器,PMC 事件和动态公式。
修复了很多 Swift 相关显示不友好的问题。
多端
官方例子 Configuring a multiplatform app 。一个示例了 NavigationSplitView、Layout、Chart 和 WeatherKit 的运用的官方例子 Food Truck: Building a SwiftUI multiplatform app
Session 笔记
https://www.wwdcnotes.com/notes/wwdc22/110371/
下面是 App Intents、WidgetKit 相关内容,这些都属于 App Services,WWDC22 专门整理了 App Service 专题 。新系统服务比如 Messages collaboration、网络、CloudKit 的 System Service 主题 。
Widget
iOS 16 和 WatchOS 9 可以使用同一套代码编写 widget。iOS 新增场景是锁屏和 Live Activities(晚些时候推出)。
利用 Smart Stack,让 widget 出现到栈顶,可以使用 TimelineEntryRelevance 。
官方参考:
介绍怎么将 widgets 添加到 lock screen 的 session Complications and widgets: Reloaded 。对应的实例代码 Adding widgets to the Lock Screen and watch faces
App Intents
打通 App Shortcuts,从 Shortcuts 应用、Spotlight 和 Siri 运行你的 App 特定任务。
对应 Session
- Dive into App Intents
- Implement App Shortcuts with App Intents
- Meet Focus filters
- Design App Shortcuts
文档 App Intents
官方几篇 App Intents 文章:
- Providing your app’s capabilities to system services
- Integrating custom data types into your intents
- App intents
- Focus
对于 Shortcut 的使用少数派有篇很棒的文章 《iOS 快捷指令搭配 Notion API,更快速地编辑内容》 。
WeatherKit
Apple 收购 Dark Sky 后带来了 WeatherKit 和 WeatherKit REST API。有着易用的 Swift 接口,还有配套的 REST API。WeatherKit 内置了 async/await 支持。
session Meet WeatherKit 。一个 Apple 提供的天气代码示例 Fetching weather forecasts with WeatherKit 。
HealthKit
提供了更详细的睡眠和锻炼数据。session 介绍 What’s new in HealthKit
Vision
更新介绍 session What’s new in Vision
VisionKit 现在有一个结合 AVCapture 和 Vision 的数据扫描仪进行实时捕捉。 session Capture machine-readable codes and text with VisionKit 。
Live Text 接口
视觉库的应用接口。可以从照片和暂停视频中获取文本。
官方参考:
- Add Live Text interaction to your app
- Enabling Live Text interactions with images
- Scanning data with the camera
ScreenCaptureKit
creenCaptureKit 框架可以给你的 macOS 程序添加对高性能屏幕录制的支持。文档地址:ScreenCaptureKit
App Store
内购
可以将 App Store Connect 内购产品同步到 Xcode。
新测试功能,比如在沙盒和 Xcode 里请求测试通知和测试其它应用内购买场景。
官方参考:
- WWDC22 的 App Store 发布和市场的专题
- StoreKit2 主题
- What’s new in StoreKit testing
- What’s new with in-app purchase
- Implement proactive in-app purchase restore
- Explore in-app purchase integration and migration
- Discover Benchmarks in App Analytics
- What’s new with SKAdNetwork
- App Store Server Notifications V2
- App Store Server API
- App Analytics
- SKAdNetwork 主题 What’s new with SKAdNetwork
- 自动更新订阅
- 管理自动续期订阅的定价
这里有个 Kevin 开源的微信支付 SDK wechatpay-swift
全球化
session Build global apps: Localization by example
request review
你可以用 requestReview 这个 environment 键提示用户对你的 App 进行评论。示例代码如下:
struct PRequestReview: View {
    @Environment(\.requestReview) var rr
    var body: some View {
        Button("来评论吧") {
            rr()
        }
    }
}
Apple 的最佳实践例子 Requesting App Store Reviews 。
参考
- What’s new in App Store Connect
- StoreKit 文档 应用内购和 App Store 互动
- App Store Server API 管理 App Store 交易
- App Store Server Notifications 实时监控应用内购事件
- Notary API 对 macOS 软件进行公证
审核
这次审核,规则 4.2.3 中取消二进制要有启动时足够的内容,这可能是因为 Background Assets 的推出可以让用户更快更聪明的下载。另外 5.3.3 放宽了彩排等限制。
性能
Apple 除了做编译优化体积外,还提供了一个 Background Assets 在应用安装后、应用更新时以及应用保留在设备上时定期在后台下载资源,看起来类似 ODR。Background Assets 的 session Meet Background Assets 。
官方参考:
- Link fast: Improve build and launch times
- MetricKit
- MXMetricManager 管理自定义指标
- MXAppLaunchDiagnostic 启动诊断
- MXAppLaunchMetric 启动相关指标
- Improve app size and runtime performance
- Track down hangs with Xcode and on-device detection
- Power down: Improve battery consumption
硬件和虚机
官方参考:
- Virtualization 文档 创建虚拟机并运行基于 macOS 和 Linux 的操作系统
- DriverKit 文档 开发在用户空间运行的设备驱动程序
- SCSIPeripheralsDriverKit
- DeviceDiscoveryExtension
- Running GUI Linux in a virtual machine on a Mac (示例代码)
session 有:
虚机的应用可见 insidegui/VirtualBuddy 这个开源项目。
网络
session Reduce networking delays for a more responsive app 和 Build device-to-device interactions with Network Framework
Metal 3
利用多核优势,高分辨率图形渲染更快,资源加载更快。使用 GPU 训练机器学习网络。WWDC22 期间社区有个给背景添加雨水效果有些流行,作者放出了代码,介绍了如何将 Metal 引入 SwiftUI 工作流,Atmos 。
官方参考:
RoomPlan
ARKit 支持的新 Swift 接口。使用摄像头和 LiDAR 创建 3D 平面图。另外还有一个视觉库的代码例子很有趣,就是从视频中检测人物行为,Detecting Human Actions in a Live Video Feed 。
官方参考:
session Create parametric 3D room scans with RoomPlan 。官方示例代码 Create a 3D model of an interior room by guiding the user through an AR experience
Passkeys
身份验证,使用行业标准。
官方参考:
交互设计
Apple 的人机界面交互指南 Human Interface Guidelines 。内容超级详细,涉及程序界面方方面面。
官方参考:
- Human Interface Guidelines > What’s New 内有图标模板等,各类 Session 汇总